

Right, let me be straight with you. There are a lot of Amazon FBA guides out there, and most of them are written by people who have never actually sold anything, or who are just trying to flog you a course at the end. This is not one of those. It is a complete, honest, step by step guide to how to start Amazon FBA in the UK, written by someone who is actually doing it.
I’m Simon, I run FBA Mogul, and I have been selling on Amazon in the UK for years doing online arbitrage. This guide is basically everything I wish someone had handed me when I started. How the whole thing actually works, how to set your business and your Seller Central account up properly, how to source and send your first products, how to run the day to day without tripping over Amazon’s rules, and how to manage your money so you do not run out of cash halfway through. No fluff, no hype, just how it really works.
To be honest with you, it is long. That is on purpose. Stick it in your bookmarks and work through it a bit at a time. You do not need to read the whole thing in one sitting.
Who this guide is for, and what you’ll learn
This is for complete beginners in the UK who want to start an Amazon FBA business the sensible way, and for newer sellers who want to fill in the gaps. Here is how it is laid out:
- Part 1: How Amazon FBA works, and which sourcing method to start with
- Part 2: Setting your business up properly (company, bank, capital, accountant)
- Part 3: Setting up your Amazon account and finding your way around Seller Central
- Part 4: Sourcing your first products, the fun bit
- Part 5: Getting your stock into Amazon (shipments, equipment, and the settings that matter)
- Part 6: Running the day to day (feedback, invoices, account health, the Buy Box, getting paid)
- Part 7: Managing your money and cash flow
- Part 8: Where you could realistically be in six months
There is also an FAQ at the very end answering the questions beginners ask most.
How to start Amazon FBA in the UK: the short version
If you want the quick version before we get into the detail, here is how to start Amazon FBA in the UK as a beginner:
- Set up a UK limited company and a business bank account.
- Open a Professional Amazon Seller Central account and verify your payment method.
- Learn to source profitable products through online arbitrage, using Keepa and SellerAmp.
- Send your first stock into Amazon as an FBA shipment.
- Win the Buy Box, keep your account health strong, and reinvest your profit to grow.
That is Amazon FBA UK in a nutshell. The rest of this guide walks you through every step properly.
Part 1: Understand how Amazon FBA works, and pick your path
Before you spend a penny, you want two things clear in your head: how a sale actually works on Amazon, and which sourcing method you are going to start with. Get these right and the rest of this guide makes a lot more sense.
How an Amazon FBA sale works
FBA stands for Fulfilment by Amazon. Basically, instead of you packing up orders and posting them out to customers yourself, Amazon does the lot. They store your stock, they pack it, they deliver it, and they even handle the customer service. That is the main reason most people use FBA. It takes the whole logistics headache off your plate so you can focus on the bit that actually makes you money, which is sourcing.
The key thing to get your head around is that you never send products straight to the customer. You send your stock in bulk into Amazon’s fulfilment centres, and from there Amazon takes over the second a sale comes in.

Here is the full workflow, start to finish. It starts with sourcing. You find a profitable product, you buy it from a supplier, and you have it delivered either to your home address or to a prep centre.
Once it arrives, it needs prepping for Amazon. That means labelling and boxing the items up. If you are using a prep centre, they handle this whole stage for you, which I will come back to later.
Next you add the product into your Seller Central inventory. This connects your offer to the existing Amazon listing so you can actually sell that item. Then you create a shipment and send the stock into Amazon.
When your shipment lands, it gets received into one of Amazon’s fulfilment centres. From there they might shuffle your stock between different warehouses depending on demand and location. Eventually the units show up in your inventory and they are ready to sell.
At that point your offer is live on the listing. If your price and your metrics are competitive, you start winning the Buy Box and the orders start coming in.
When a customer places an order, Amazon does everything. They pick the item off the shelf, pack it, ship it, and manage the delivery. You do not need to lift a finger at this stage.
Amazon also handles returns for you. Customers get a return window, and if they send something back, it goes back into Amazon’s system. If the product is still in good nick, it can go back into your sellable inventory. If it is damaged or opened, it gets marked as unfulfillable and you decide whether to have it sent back to you or disposed of.
So the simple flow is this: source product, buy product, deliver to you or your prep centre, add to inventory, create shipment, prep and label, send to Amazon, Amazon receives and distributes, product goes live, customer orders, Amazon picks, packs and ships, customer receives, and Amazon handles the return if there is one.
Key takeaway: you do the buying and the sending in. Amazon does the storing, the selling admin, the posting and the returns. Once that cycle clicks in your head, the whole model gets a lot easier to scale.
Choosing your sourcing method: a quick honest comparison
There are a few different ways to get the stock you sell, and to be honest with you, this is where a lot of beginners get it wrong before they have even started. So here is my straight take on the four main methods. The short version: start with online arbitrage. Here is why for each one.
Online arbitrage, the method I would start with
Online arbitrage, or OA, is just buying products from online retailers when they are cheaper than they sell for on Amazon, then reselling them on Amazon for a profit. The reason it works is simple. Retailers are constantly running promotions, voucher codes and flash sales, while Amazon pricing tends to stay relatively stable. That gap is where your profit sits.
Now, I will be honest, it is not random product flipping. The sellers who do well at OA are the ones who learn to read the data properly rather than just buying anything that is on offer. At the start it feels overwhelming because you are learning a load of things at once: Keepa, SellerAmp, sales rank, seller count, Buy Box behaviour, pricing stability, inventory management and cash deployment. That is exactly why the first few months are the hardest. It takes time to build that pattern recognition.

The tool that ties all of this together is Keepa. It gives you the historical data on a product: pricing history, sales rank, seller counts, deals, price tracking, the lot. Inside Keepa you have got the Deals section for spotting Amazon price drops, a Track section for price alerts, Seller Look Up for studying other sellers, and Product Finder, which lets you filter Amazon’s entire catalogue to dig out opportunities. I am not going to bury you in filter settings here. I have written a full getting started guide for that, so go and read my Keepa Product Finder guide when you are ready to actually start sourcing.

The big reasons OA is the right starting point: it is unbelievably scalable because you have got Amazon’s whole catalogue to work with, you can source from your laptop at home of an evening, the invoicing is cleaner than retail, and crucially you can usually return stock if you get something wrong. That last bit matters more than people realise when you are new. The real magic is replenishment, finding products you have sold before and can keep going back to, because you already understand the listing, the competition and how it behaves. That removes a huge chunk of the guesswork.
To go properly deep on OA, read my Mastering Online Arbitrage series, and have a look at OA Hero, which is the sourcing tool I use to speed all of this up.
Key takeaway: online arbitrage is the beginner method. Lower risk, returnable stock, scalable, and it teaches you how Amazon actually behaves. Start here.
Retail arbitrage, is it still worth it?
Retail arbitrage, or RA, is going into physical shops, buying discounted products off the shelf, and reselling them on Amazon. For a lot of sellers, including plenty I know, RA was the first method they ever used because you can learn Amazon with relatively low capital while you build up your Keepa and SellerAmp skills.
Years ago RA was a lot easier than it is now. Fewer sellers, fewer people scanning in store, more stock on the shelves. These days it is far more competitive. Don’t get me wrong, it still works and there are still people making decent money from it, but in my opinion it is no longer the strongest model. The biggest issue, by a mile, is receipts. When you buy in a shop you get a standard till receipt, not a proper VAT invoice, and Amazon does not always accept a shop receipt as strong enough proof of authenticity. So you can buy a completely genuine product from a legit retailer and still struggle to defend an authenticity or IP complaint because your paperwork is weak. From an account health point of view, that is the real risk. On top of that, paper receipts fade, get lost and are a nightmare to organise.

It is also hard to scale and hard to systemise. Shops have limited shelf stock, purchase limits and patchy replenishment, and you are spending your time driving between stores, scanning, queuing and lugging stock about. Compared to sourcing from your laptop, that is a lot of time and fuel with no guarantee you find anything.
That said, RA is genuinely useful at the very start because it teaches you product analysis, SellerAmp and how listings behave, fast. For most people it ends up being a stepping stone into online arbitrage rather than a long term model. If you want to give it a go, start with my retail arbitrage beginner’s guide, and have a read of my store specific guides for Tesco and Home Bargains.
Private label, why not yet
Private label is where you create your own branded product and sell it on Amazon under your own brand name. Instead of reselling an existing product like you do with arbitrage, you are building your own listing, your own packaging and your own branding from scratch. On social media it gets pushed hard because people see the big turnover numbers and the profit screenshots. It can absolutely work long term, but in my opinion it is one of the most difficult and riskiest models for a beginner, and I see a lot of new sellers jump straight in and lose serious money.
The first problem is upfront capital. With OA you start small and build up. With private label you are usually looking at large minimum order quantities, branding, packaging, shipping, photography, trademark costs and a PPC advertising budget. So you are risking a big chunk of money before you even understand how Amazon properly works.

The second problem is you are starting from zero. With arbitrage you join an existing listing that already has sales history, reviews and ranking. With private label you have to generate the reviews, build the ranking and run the PPC yourself, all while competing against established sellers who have got thousands of reviews and big ad budgets. And PPC is the bit beginners massively underestimate. Advertising is more or less mandatory with private label, because without it your product barely gets seen, and it is very easy to overspend, target the wrong keywords and burn through your cash.
Then there is inventory risk. With arbitrage, if a product stops performing you just stop buying it. With private label you have usually placed one big order upfront, so if it flops you are stuck with a load of stock, your cash is trapped, storage fees build up and the ad spend keeps going. One bad launch can wipe out a huge amount of capital. It is cash flow heavy too: you pay suppliers upfront, wait weeks for manufacturing, wait for shipping, spend on ads and wait for rankings to climb. Your money is tied up for ages.
The honest reality is that private label is not passive income and it is not easy money. You are building a brand, a supply chain, a marketing system and a logistics operation all at once. That takes experience, systems and proper capital. It can work, but it is not where beginners should start.
Key takeaway: private label is not impossible, but it is not the easy Amazon business people online make it out to be. Learn Amazon through OA first, build your experience and your cash, then look at private label later if you still fancy it.
Wholesale, why I would not rush it
Wholesale is buying products in bulk directly from brands or authorised distributors, then reselling them on Amazon. You open trade accounts and buy at wholesale pricing straight from the supplier. A lot of people are drawn to it because it sounds more professional and more scalable. You are dealing direct with brands, placing bigger orders, building supplier relationships. On paper it sounds like the perfect Amazon business.
In my opinion though, it is not a good starting point for most beginners. It can absolutely work long term, but there are a few challenges new sellers really underestimate.
The biggest one is how much money you need upfront. Most wholesalers and distributors want minimum order quantities, trade account applications, bigger inventory purchases and consistent repeat ordering. So you often have to commit a lot of capital very quickly just to get going properly. With OA you can test products in smaller quantities and spread your risk. Wholesale tends to mean placing larger orders before you really understand how the products behave, and once you add Amazon fees, shipping, VAT, prep costs and software on top, cash flow can get extremely tight extremely fast.
Getting approved is the next hurdle. Legit wholesalers do not just hand accounts out. They often want existing business history, a professional website, established turnover, VAT registration, trade references and a strong online presence. As a brand new seller you have very little of that credibility yet. A lot of beginners think wholesale is just emailing suppliers and opening accounts, but brands are getting much stricter about who they let onto their listings.
Then there is competition. Loads of wholesale listings are already packed with established sellers sitting on huge stock quantities, dominating the Buy Box, with long standing supplier relationships. And because multiple sellers are buying from the exact same distributors, wholesale products get saturated, which leads to price wars, squeezed margins and slower sales. It is frustrating, because the product can look profitable on paper and the competition just eats your margin alive. On top of that you have got the inventory risk of overcommitting to stock you then struggle to move, and the simple fact that strong supplier relationships take time to build. As a new seller with no order history, you do not get the best pricing or the best opportunities straight away.
So, can I steer you somewhere sensible? If you are still set on wholesale, please do not start cold-calling brands and chasing trade accounts you have got no chance of getting approved for yet. The accessible way in is an online wholesale platform where you can buy realistic quantities without committing to massive minimum orders. That is where Qogita comes in. It lets you buy genuine branded stock with proper invoices, in quantities that actually make sense for a smaller business, which solves a lot of the cash flow and approval problems I have just gone through. Have a read of my Qogita review and my guide on Qogita sourcing to see how I use it.
Key takeaway: traditional cold wholesale is hard work for a beginner. Protect your cash flow and learn the platform through OA first. If you do want wholesale stock, use an accessible online platform like Qogita where you can buy realistic quantities with proper invoices, rather than chasing brand approvals you are not ready for yet.
Amazon to Amazon (A2A), a fifth option worth knowing
There is one more method worth a mention, Amazon to Amazon, or A2A. This is buying a product cheap on one Amazon marketplace and reselling it on another, because the same product is often priced differently across the UK and the European marketplaces. To be fair it is a tidy, fairly passive way to source once you are up and running, and I would happily put it alongside OA and RA as something a beginner can dabble in. Wholesale and private label though, I would still leave well alone until you have got a year or so under your belt. We get properly hands on with sourcing in Part 4.
Part 2: Set up your business properly
Right, the slightly boring but important bit. Let us get your business set up properly, your company, your bank, how much money you actually need, and whether you need an accountant yet. Nail this foundation and everything after it runs smoother.
Setting up your limited company
If you decide to go down the limited company route rather than operating as a sole trader, there are a few steps you need to complete before you do anything with Amazon or open a business bank account. Getting this bit right from the start saves you a load of issues later.
The first decision is whether you want to use your home address or a virtual address for your limited company. Both are valid, they just serve different purposes. If you would rather keep your personal address private, a virtual address is a good shout. It is a paid service that gives you a registered office address and an inbox where all your official company documents land.
For every single one of my businesses I use Tide, and they will register your limited company for you for just £14.99, compared to the £100 Companies House now charges to do it yourself. You get your certificate of incorporation within about a business day, and a free Tide business account set up at the same time, so your company and your banking are sorted in one go. You can get started with Tide here, and enter the code NLRB5G when you register. During sign up you will be asked to pick your SIC code, which I will come to next.

Your SIC code defines what type of business you run. For Amazon FBA and e-commerce, the code you want is 47910, Retail sale via mail order houses or via internet. This categorises your business correctly and helps you avoid issues with banks and Amazon down the line.
You can register directly through Companies House yourself if you prefer, but they now charge £100 to do it (the fee went up in 2026), so going through Tide at £14.99 is both cheaper and less hassle.
Whichever route you go, you will need to allocate shares, assign directors, upload ID, confirm your SIC code and register your business details correctly. This is the legal structure of your company, so it has to be accurate.
Here is why this matters so much. Your limited company setup has to be fully complete before you apply for a business bank account or your Amazon Seller Central account. Banks and Amazon will ask for your company registration number, trading name and address details, and if anything is missing or wrong you can face delays or rejections.
Key takeaway: get the company set up properly and accurately first, use SIC code 47910, and doing it through Tide for £14.99 sorts your formation and your free business account in one go.
Picking the right bank provider
Choosing the right bank is an important step when you are setting up. Your business account gets used for buying products, paying staff, receiving your Amazon payments and everything else business related. Getting the right provider from the start saves you time, prevents verification headaches and makes your finances much easier to manage.
Before you apply for a business bank account, make sure your company is fully set up first. Most banks will want your limited company registration number, company trading name, director details, registered company address, trading address if it is different, the nature of your business, and proof of identity. Having all of that ready speeds the application up and cuts the risk of delays or rejections.
Most Amazon sellers steer clear of high street banks like Barclays and HSBC. They are reliable enough, but they tend to be slow, less flexible and a pain to integrate with online platforms. App based business banks are quicker to open, easier to use, and plug straight into Amazon and your accounting software.
The one I use for every single one of my businesses is Tide. You can open a Tide business account here, and enter the code NLRB5G when you sign up. It is quick to set up, the app is genuinely easy to use, the business account is free, and it integrates neatly with Amazon and your accounting. To be honest with you, it is the one I would point any beginner to.

Monzo Business and Revolut Business are both perfectly good as backups if you would rather, and plenty of sellers use them without any issues. But Tide is the one I would go with.
One quick setup tip, and it takes about thirty seconds. When you add your payment method to Amazon, use your Tide virtual card, which you activate in the app, rather than a physical card. That keeps everything running smoothly with Amazon’s payment checks, and then you never think about it again.
Key takeaway: open a Tide business account, it is what I use across all of my businesses, set up your virtual card for your Amazon payments, and you are sorted. Monzo or Revolut are fine backups if you prefer one of those.
How much money do you actually need to start?
This is probably the question I get asked more than any other, so let me give you a straight answer. To be honest with you, you can technically begin with a small amount, but having enough capital makes the whole thing far smoother and saves you a load of early frustration.
Today, a strong starting point is between £3,000 and £5,000. Anything above that gives you more room to grow quicker, but £3,000 is a practical minimum if you want to build properly rather than struggle from the off.
Here is why that number matters. Your money does not just go on stock. From day one you have got regular business expenses: your Amazon seller subscription, your profit tracking and product research software, and possibly access to sourcing leads or deal groups. None of these are huge on their own, but together they add up quicker than people expect.
If you start with less than £3,000, most of your capital ends up tied up in those non money generating expenses instead of stock, and stock is the bit that actually makes you money. That limits how much you can spend on products and how fast you can grow. With a tiny budget, the wrong couple of products, or just not enough products, can stall your progress and mess up your cash flow.
When you start with £3,000 or more, you can spread your money across several products instead of betting it all on one or two. That lets you test different categories, hold more ASINs and give yourself a proper shot at the Buy Box, which helps you learn faster and reduces your risk.
Don’t get me wrong, you do not need to throw it all in on day one. Start by buying products in smaller quantities, reinvest your profits, and ramp your order sizes up gradually as your bank grows. Get it in, get it sold, get it churned. That builds momentum while protecting your cash flow.

Key takeaway: aim for £3,000 to £5,000. £3,000 is a workable minimum if you are sensible, but the more you can comfortably put in (money you will not need back in a hurry), the faster you will grow.
Do you need an accountant from the start?
This is one where sellers go very different ways. Some register with an accountant the second they open their Amazon account, others wait until the business grows or they hit the VAT registration point. In my experience, getting an accountant from day one is not essential, especially while you are still testing the model and keeping costs down.
When I first started I did not hire an accountant straight away. I only brought one in when I was getting close to VAT registration. At that point I set up Xero and Link My Books, and my accountant helped get everything organised properly. The downside was I had to go back and enter all my past transactions, which took a bit of time, but it was completely manageable because I had kept good records. I stored every single invoice and kept a detailed buy sheet logging all my purchases, so I could match each bank transaction to a product order and reconcile everything properly once the software was set up.
The main upside of hiring an accountant from the beginning is that your accounts are organised from the start. Your bookkeeping stays up to date, you avoid a big backlog later, and you have got professional support if you are unsure about anything tax related. It also means that when VAT registration becomes necessary, your records are already structured and easier to manage.
The biggest drawback early on is cost. Xero and Link My Books together can run to around £100 a month, and an accountant can charge anywhere from £50 to £100 a month on top of that. When you are just starting out and still learning, that is a significant overhead that comes straight off your cash flow. In the early stages most of your focus should be on buying stock, learning sourcing and building sales, and high fixed costs can slow that down.
So a common, sensible approach is to manage things yourself at the start while keeping your records clean. Save every invoice, keep a buy sheet, and keep your bank transactions organised. Then when your revenue climbs or you approach the VAT threshold, you bring in an accountant and backdate your bookkeeping using proper software. This is completely normal practice and it works well as long as your records are accurate.
Key takeaway: an accountant from day one is helpful but not essential, especially if cash flow is tight and you are confident you can stay organised. Keep clean records from the start and bring one in as you approach VAT registration.
Part 3: Set up your Amazon account
Company sorted, bank sorted. Now let us get your Amazon account set up and learn your way around Seller Central. We will keep this to the basics you need to get going, and come back for the more advanced settings later, once you have got some stock to send in.
Your Amazon Seller Central subscription
To sell on Amazon using a professional account, you pay a monthly subscription of £25 plus VAT, which comes to £30 per month. Amazon takes this straight out of your charge method automatically, so you do not need to make a manual payment each time. It just comes off.
This fee shows up in your transactions and you need to record it as a business expense. Basically, make sure it is tracked in your bookkeeping software or noted on your records, because it reduces your taxable profit and forms part of your ongoing operating costs. It is only £30 a month, but it is still money going out before you have sold a single unit, so it is one of those costs you want to factor in from day one.
There is a free individual plan as well, but for anyone serious about building a proper FBA business, the professional account is the one you want. The individual plan limits what you can do and charges you per item sold, so it works out worse the moment you start shifting any real volume.
Verifying your deposit method and charge method
When you first sign up to Amazon, you have to verify your deposit method and your charge method. This is a mandatory setup step. If you do not complete it correctly, you can run into account restrictions, delays, or issues withdrawing funds. So it is worth getting right first time.
Your deposit method is the bank account Amazon pays your disbursements into. Your charge method is the card Amazon uses to collect fees and charges. Both need to be set up properly.
Before you start
Make sure you have the following ready:
- Your business bank account details for the deposit method
- A valid debit card for the charge method that supports online payments
- Avoid prepaid cards, Amazon commonly rejects them
Add and verify your deposit method
- Log into Amazon Seller Central.
- Click the cog icon in the top right.
- Select Account Info.
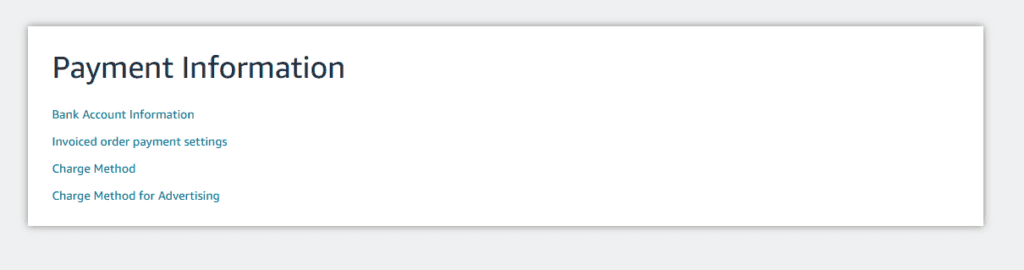
- Under the Payments section, select Payment Information.
- Click into Bank Account Information.
- Enter your bank account details carefully, including account name, sort code, and account number.
- Double check your details before saving, incorrect details can delay disbursements.
- Save and submit the information.
Amazon may request verification checks depending on your account setup. If anything fails, Amazon will usually show an error message within this section.
Add and verify your charge method
- Stay within Payment Information.
- Select Charge Method.
- Add your debit card details, including the billing address linked to the card.
- Make sure the card supports online payments and is not prepaid.
- Save the card details.
After you add the card, Amazon usually runs a small verification transaction, often one penny. This just confirms the card is active and valid. Keep an eye out for it in your banking app.
Assign the charge method to marketplaces
After adding your charge method, Amazon may ask you to assign it to the marketplaces you are registered for.
- In the charge method section, look for marketplace assignment.
- Ensure the card is assigned to the Amazon UK marketplace at minimum.
- You will need to do this for each marketplace, even if you are not selling there.
- Save the changes.
If the charge method is not assigned correctly, Amazon may block your ability to sell or charge fees, which can lead to account issues. So do not skip it.
Common mistakes to avoid
- Using a prepaid card for the charge method
- Entering bank details incorrectly for the deposit method
- Not completing marketplace assignment
- Ignoring the small verification transaction in your banking app
Once both your bank account information and charge method are added, verified, and assigned correctly, your payments setup is complete and your account is ready to progress through the rest of the Amazon setup steps.
Key takeaway: use a proper debit card that supports online payments, never a prepaid card, and double check your bank details before saving. Get the deposit and charge methods right at the start and you avoid the verification headaches that catch a lot of new sellers out.
A tour of your Seller Central dashboard
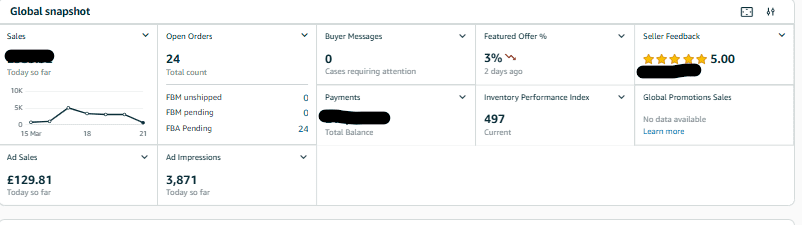
When you first log into Amazon Seller Central, the dashboard is the main screen you will see. This is basically the control centre of your business, giving you a quick overview of your performance, sales, account health and activity all in one place. Learning how to read this properly is important because it lets you quickly spot issues, track progress and stay on top of daily operations without having to dig through loads of menus.
Each section on the dashboard gives you a snapshot of a different part of your business, and over time you will naturally start checking certain areas more than others depending on what stage your business is at.
Sales and performance
At the top left, you will see your Sales section. This shows how much revenue you have generated, usually displayed as “Today so far”, along with a small graph showing recent performance. This gives you a quick idea of how your day is going and whether your products are selling as expected.
Just below that, you will often see Ad Sales, which shows how much revenue has come specifically from advertising. This is useful if you start running ads, because it helps you understand how much of your sales are being driven by paid traffic.
Orders overview
The Open Orders section shows how many orders are currently active. This includes different fulfilment types such as:
- FBM (Fulfilled by Merchant) orders
- FBA (Fulfilled by Amazon) pending orders
For most FBA sellers, the main number to watch is the FBA pending figure, which shows how many orders Amazon is currently processing. This gives you a sense of your current sales volume and activity.
Buyer messages
The Buyer Messages section shows how many customer messages need your attention. Ideally, this should always be at zero or very low, because Amazon expects you to respond within 24 hours. If this number creeps up, it is a sign you need to check and respond to messages quickly to avoid it affecting your account health.
Featured offer percentage
The Featured Offer % refers to how often you are winning the Buy Box. This is a key metric in Amazon selling, because most sales go through the Buy Box. A higher percentage means your pricing, fulfilment and account performance are competitive.
If this number is low, it may mean your pricing is not competitive enough or that other sellers are outperforming you on that listing.
Seller feedback
The Seller Feedback section shows your customer rating, usually out of 5 stars. Keeping a high rating is important for long term account health and trust. While FBA reduces the amount of feedback you get directly, it is still something to keep an eye on.
Payments and balance
The Payments section shows your current account balance within Amazon. This is the amount available or pending before it is transferred to your bank account. This ties directly into your cash flow, and it is important to monitor this alongside your withdrawal schedule.
Inventory Performance Index
The Inventory Performance Index (IPI) is a score Amazon gives based on how well you manage your inventory. This includes factors like sell through rate, excess stock and stranded inventory.
A higher score means efficient inventory management, while a lower score can lead to storage limits. As you scale, this becomes more important to monitor regularly.
Advertising and traffic
The Ad Impressions section shows how many times your ads have been seen. This helps you understand how much visibility your products are getting. Combined with ad sales, this gives you a clearer picture of your advertising performance.
Promotions and additional data
You may also see sections like Global Promotions Sales, which show performance from any promotions or deals you are running. These will not always have data, especially when you are starting out.
Using the dashboard daily
As you build your business, this dashboard becomes something you check every day. It lets you quickly answer the key questions: are you making sales, are there any issues with orders or messages, are your ads performing, and is your account in good standing? Over time, you will rely on this screen to guide your daily decisions and keep things running smoothly.
Part 4: Sourcing your first products (the fun bit)
Right, this is the bit you actually signed up for. Up to now we’ve done the boring stuff, the company, the bank account, getting your Amazon account set up and verified. All necessary, none of it particularly thrilling. But this is where it gets good, because this is the part where you find a product, work out that it makes you money, buy it, and watch it sell. To be honest with you, the first time you see a sale come through on a product you found yourself, you’ll be hooked. I was.
The method you’re starting with is Online Arbitrage, or OA. We covered the high level comparison of the sourcing methods earlier in this guide, so I won’t go over all that again, but the short version is: OA is buying products from online retailers at a lower price and reselling them on Amazon for more. That’s it. The reason I steer every beginner towards it is simple, you can return stock if you get it wrong. Buy a private label batch from China and mess it up and that money’s gone. Buy a few units off a UK retailer’s website and the deal isn’t what you thought, you just send it back. That safety net is everything when you’re learning.
Here’s the most important thing I can tell you before we go any further. Online Arbitrage is not random product flipping. It’s not “ooh that looks cheap, I’ll buy a load.” It’s reading data. The whole model works because retailers are constantly running promotions, voucher codes, flash sales and clearance, while the price on Amazon stays relatively stable. That gap is where your profit lives, and your job is to spot it and prove it’s real before you spend a penny. Don’t get me wrong, it feels overwhelming at the start, you’re learning Keepa, sales rank, seller count, Buy Box behaviour and pricing stability all at once. That’s normal, the first couple of months are the hardest. Then one day the charts stop looking like random squiggles and start telling you a story, and that’s when it clicks.
How sourcing actually works day to day
When you sit down to do it, there are basically two tools doing the heavy lifting and you’ll be living in both, Keepa to find products and SellerAmp to analyse them.
Keepa, for finding things
Keepa is the foundation of the whole thing. It gives you the full history on any product, the price over time, the sales rank over time, how many sellers have been on the listing, the lot. Once you can read a Keepa chart you can look at a product and know whether it actually sells, whether the price is stable, and whether the competition is getting worse or better. That’s most of the battle.
Inside Keepa there are a few areas you’ll use to find products. The Deals section shows you Amazon price drops. Product Finder lets you filter Amazon’s entire catalogue down to the kind of products you’re after, by sales rank, seller count, category, whatever fits how you like to source. And Seller Look Up lets you peek at what other sellers are stocking and pull ideas from their inventory. I’m not going to walk you through every filter setting here, because honestly it deserves its own write up and I’ve done one. For the proper depth on configuring Keepa for sourcing, go through my Keepa Product Finder getting started guide, that’s where all the detail lives.
The potential with Keepa is basically unlimited, you’ve got the whole Amazon catalogue to dig through, but it does take patience. Some sessions you’ll find three or four cracking products, some you’ll find nothing. That’s fine. Even on a dry day you’re learning brands, websites and discount patterns that’ll pay off later.
SellerAmp, for analysing things
Once you’ve found a product, SellerAmp is the tool that tells you whether it’s any good. You drop it in and it shows you the numbers that matter, your profit, your ROI, the sales rank, how many sellers are on it, and whether you’re likely to get a share of the Buy Box. That’s your quick gut check before you take a product seriously. So the rhythm is: Keepa to find it, SellerAmp to analyse it. You’ll do that loop hundreds of times, and over time you start filtering out the duds in seconds.
Working out if it’s actually profitable
This is the bit beginners get wrong, and it’s the bit that costs people money, so pay attention. The number that matters is your net profit, what’s left after every single cost has come out. Not the big difference between what you paid and what it sells for, that means nothing on its own. Amazon takes a referral fee, FBA takes a fulfilment fee, there’s VAT to think about, there might be a prep cost. All of that comes off before you see a penny.
SellerAmp does this maths for you on the fly, which is why you’ll use it constantly. But you want to understand what’s going on under the bonnet, because if you don’t understand the fees you can’t spot when something’s off. So early on, run a few products through my FBA calculator by hand. Do it twenty times and you’ll start eyeballing roughly where a deal lands before SellerAmp even finishes loading, and that’s a proper edge.
And don’t expect to be perfect off the bat. 20% ROI in your first month is good. That’s profit, you’ve made money selling on Amazon in month one, so don’t beat yourself up chasing huge margins early on.
The buy decision (this is where the money’s made)
Here’s my favourite saying, and I bang on about it constantly because it’s true: the money is made in the buy, not the sell. By the time you’ve bought a product, your profit is more or less already decided, and the selling part mostly takes care of itself if the buy was right. So all your effort goes into getting the buy correct. Get it right and the rest is easy. Get it wrong and there’s nothing you can do later to fix it.
And the single best kind of buy is a replenishable. That’s a product you’ve already sold successfully and can go back and buy again, and again, and again. To be fair this is the most powerful thing in the whole business and it’s where the real money is. Once you’ve sold a product you already know the listing, the competition, the pricing, how fast it shifts. All the uncertainty’s gone. So when that retailer discount comes back round, or a competitor drops off the listing and the price recovers, you just buy it again.
This is the difference between scrabbling around for brand new deals every single day forever, and working from a list of proven winners. A good tip is to export the products you’ve worked out into a spreadsheet through SellerAmp and keep going back to them, so your sourcing stops being a blind search and becomes “right, what on my list is buyable today?” When you find a genuinely good replenishable, you milk it for everything it’s got. They don’t last forever, but while they do, they’re gold.
Buying and selling, start to finish
We covered how an FBA sale actually works earlier, so I’ll keep this tight and just join the dots. Once SellerAmp says the numbers are good, you place the order with the retailer. The stock comes to your home, or to a prep centre if you’d rather not deal with the boxes yourself (they receive it, label it and forward it to Amazon for you). You create the shipment in Seller Central, and once it’s checked into Amazon’s warehouse your offer goes live on the listing.
Then it’s down to being competitive. When your price is right you win the Buy Box, that’s the bit on the listing where the customer clicks “Add to Basket”, and the sale lands with you. And the goal, every time, is to keep that loop spinning: get it in, get it sold, get it churned. The faster your money goes out as stock and comes back as profit, the faster you can buy again, and that’s how a small pot grows.
Other ways in, if OA feels like a big leap
OA is what I’d start with, 100%, but it’s not the only door in. The first alternative is Retail Arbitrage, or RA, which is the same idea but in physical shops, you walk round, scan products with an app, and buy the ones that profit. It’s a brilliant low capital way to learn, because you can go out with fifty quid, find a couple of deals on a shelf, and get a taste of the process without much risk. Start with my retail arbitrage beginner’s guide, and I’ve done store specific walkthroughs for RA at Tesco and RA at Home Bargains to get you going.
The other is Amazon to Amazon, or A2A. This is buying a product from one Amazon marketplace and reselling it on another, because the different marketplaces often price and discount the same product differently. It’s a tidier, more passive way to source, and the invoicing tends to be cleaner, which matters when you’re trying to get ungated (more on ungating elsewhere in this guide). You can run it on the UK side or stretch it into the European marketplaces too, Germany, France, Spain, Italy. My Sourcing Secrets series covers it across part one on A2A in the UK, part two on building it into a business, and part three on the EU marketplaces.
Whichever you pick, the underlying skill is the same. You’re reading data, proving the buy before you commit, and being consistent.
Key takeaway: Online Arbitrage isn’t random flipping, it’s reading data. Use Keepa to find products and SellerAmp to check the net profit before you spend a penny, remember the money is made in the buy not the sell, and chase replenishables you can buy again and again. Get the buy right and the selling sorts itself out.
Part 5: Getting your stock into Amazon
Right, you have sourced some products, the fun part is done. Now for the slightly less glamorous job of getting that stock into Amazon, plus the settings you want to sort before things go live. Stick with me, this is the stuff that quietly makes or breaks new sellers.
When to send your first shipment
A common mistake new sellers make is rushing to send their first few items into Amazon the moment they buy them. It feels productive, but to be honest with you it is usually not the most efficient way to start. Shipping tiny quantities means you repeat the same prep and delivery process over and over, which costs more in both time and money. A better approach is to spend a short period sourcing and build up enough products to fill a box properly.
When you collect a wider range of items before creating your shipment, you make the most of your courier cost, cut down the admin, and learn the workflow in a more organised way. Instead of sending two or three units, you might send twenty or thirty, which makes the whole effort far more worthwhile.
It also gives you time to double check profitability, confirm there are no listing issues, and make sure your documentation is correct before anything goes in.
So aim to build a solid box of inventory, prep it carefully, then send it in as your first delivery. Some sellers prefer to ship straight away, but waiting until you have proper volume usually leads to a smoother and more cost effective start.
How to add a product in Seller Central
Before you can send stock into Amazon or make a sale, your product has to be added correctly inside Seller Central. This is the step that connects your offer to an existing Amazon listing, which lets you compete for the Buy Box and start selling. Get it wrong and you can run into pricing errors, so taking your time at this stage helps avoid unnecessary issues later on.
The thing to understand is that when you add a product, you are not creating a brand new listing. As a reseller, you are attaching your offer to an existing ASIN that already has a listing. You are basically just telling Amazon that you also have this item in stock and want to sell it. During this process, you will confirm important details such as condition, price and fulfilment method.
Before listing any product, make sure you have:
- Verified that you are eligible to sell the brand
- Checked that the product matches the listing exactly
- Confirmed the item is profitable
Once the product is live in your inventory, you can then move on to preparing and shipping it into Amazon’s fulfilment network. For a more detailed walkthrough of this process, have a read of my full guide on adding products to Amazon inventory.
Here is the process step by step:
- Add Products.

- Enter your ASIN.
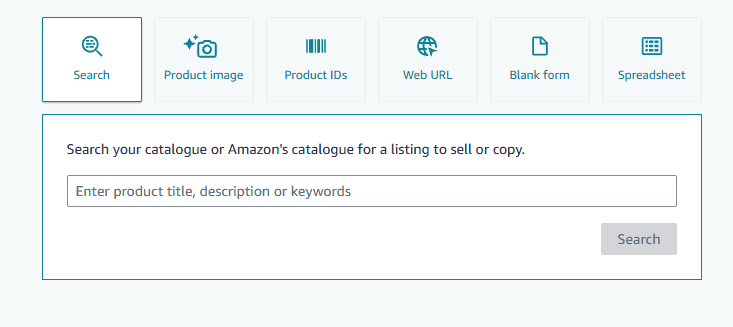
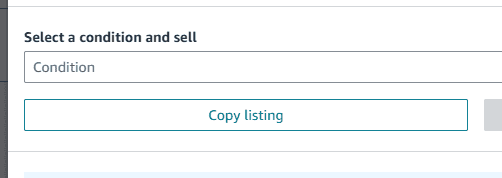
- Select “New” in condition and click “Sell This Product”.
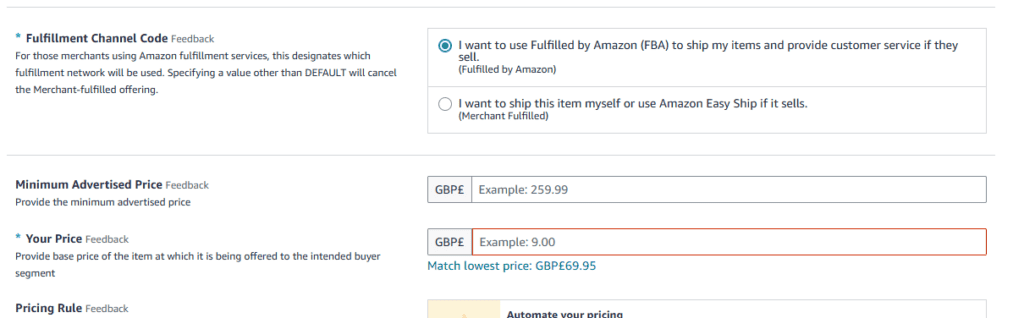
- In Fulfilment Channel Code, select the top option, then input your price.
- At this point click the “submit” button. It will then prompt you to input this message. Select “No” on batteries required and select “unknown” on Dangerous Goods Regulation.
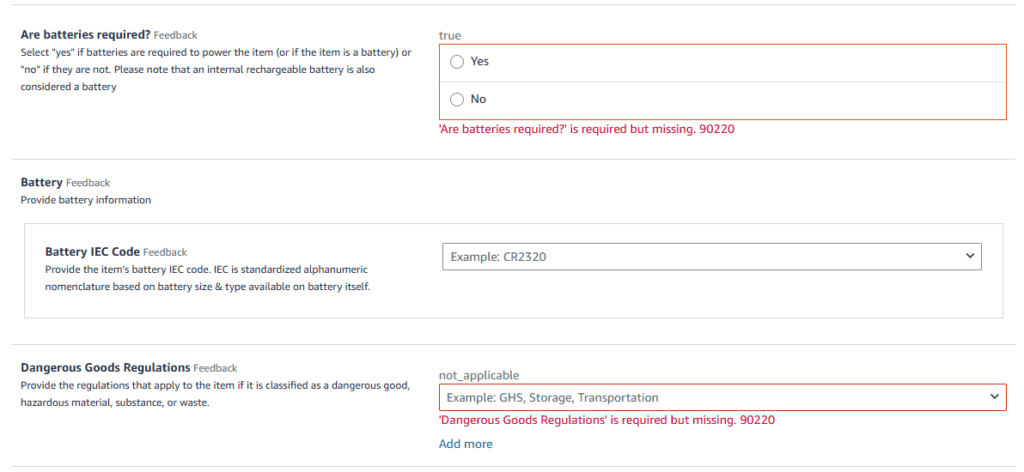
- Make sure you have “Use Amazons Barcodes” selected here. You can now proceed to List as FBA and Send to Amazon. The product is now added to inventory. It will take 15 minutes for the item to be available in your inventory to send into Amazon.

How to create a shipment
Creating a shipment is how you send your stock into Amazon’s fulfilment centres so it can go live and start selling. This process tells Amazon what you are sending, how it is packed, and how it will arrive, so it is important to follow each step correctly to avoid delays or issues when your stock is received.
- Find the product you want to send in your inventory, tick the box next to it, then click Send or Replenish Inventory.
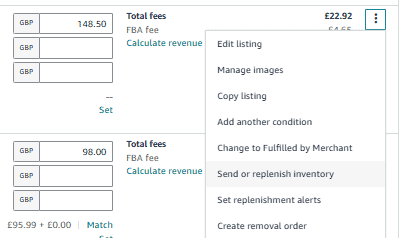
- You will be taken into the shipment workflow. Confirm your Ship From Address, this should be where the products are being packed from.
- Select All FBA SKUs, then using the search bar find the products you wish to send. Fill out quantities, expiry dates and pay attention to packing information.

- Now print the SKU labels, then select “pack individual units”.
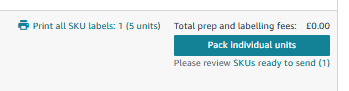
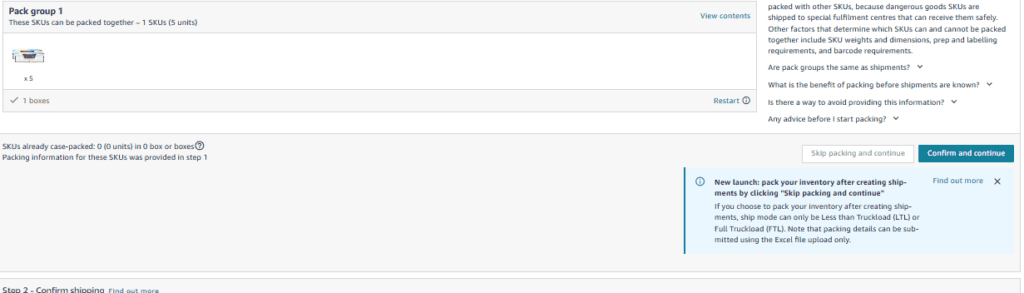
- Pack groups will then be shown. Make sure you pack the pack groups together and not mixed with each separate pack group. On packing information it will give you 2 options. Option 1 is if you have one box, this then asks you to enter the box details. Option 2 is if you have multiple boxes, enter all of your details and then select the completed option at the bottom.

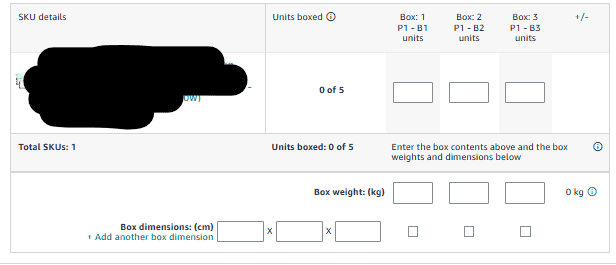
- Select confirm and continue.
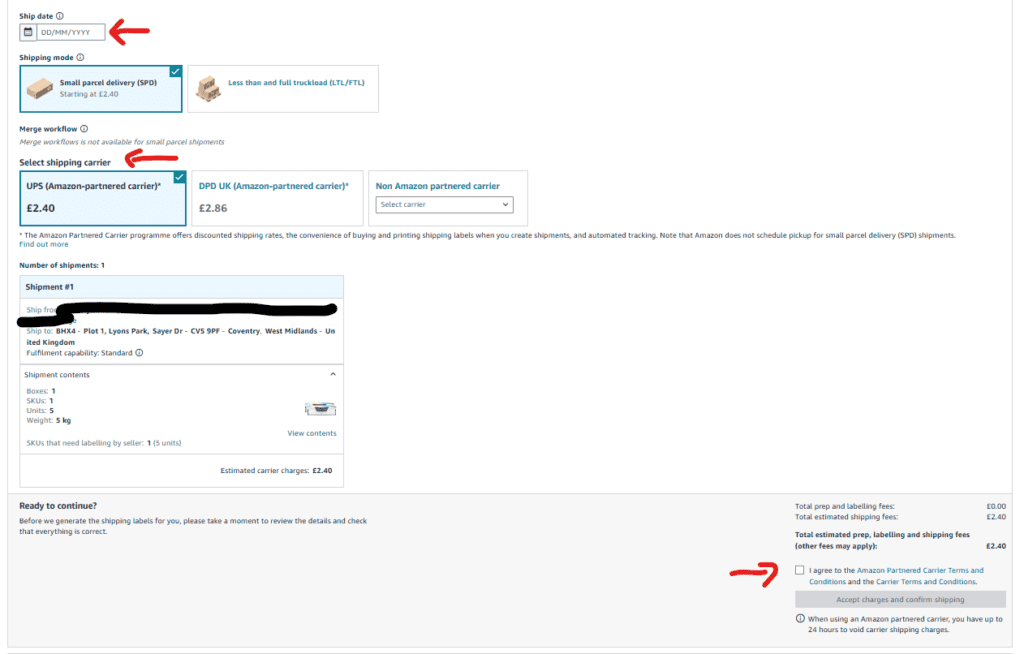
- Select your date and shipping carrier. I usually choose UPS. You can now select the option bottom right to proceed.
For Hazmat, you will have to choose Amazon Non partnered carrier as UPS and book it in with UPS on their website. You do not need to do this if the products are not Hazmat.
- Print your box labels, then attach them securely to each box, making sure each box has the correct label. If the box is over 15kg, you must attach a self printed sticker stating “heavy” on each side of the box. If you are completing a Hazmat shipment, you will need to paste the tracking numbers into UPS.
- You can now schedule a collection from UPS or take it to your local UPS point. If you are scheduling a collection with UPS, you will need to input your Amazon tracking numbers.
https://wwwapps.ups.com/pickup/schedule?loc=en_GB
Key takeaway: follow the workflow in order, print and attach your labels correctly, and remember the 15kg “heavy” sticker rule and the separate Hazmat process. Get the steps right and your stock checks in cleanly with no delays.
The equipment you need
When starting Amazon FBA, one thing that often gets overlooked is equipment. At the beginning, people focus heavily on sourcing products and learning the business model, but having the right equipment setup is extremely important because it makes the operational side of the business actually viable.
If you are not using a prep centre, then having this setup at home is essential because you will be responsible for:
- Printing labels
- Poly bagging products
- Packing shipments
- Labelling boxes
- Preparing inventory correctly for Amazon
Even if you are using a prep centre, I still think it is important to have a small setup at home. There will still be times where:
- You prep products yourself
- You need to inspect products
- You send smaller shipments
- You FBM products
- You need to relabel inventory
- You deal with stranded or returned stock
Having a basic setup at home makes everything much easier and gives you flexibility within the business.
Before products can be sent into Amazon Fulfilment Centres, they often need preparing correctly. This can include:
- Printing SKU labels
- Covering barcodes
- Poly bagging products
- Packing boxes
- Labelling shipments
Having the correct setup from the start saves a huge amount of time and makes the whole process much smoother. Without the right equipment, prepping shipments can quickly become frustrating and inefficient.
Label printers
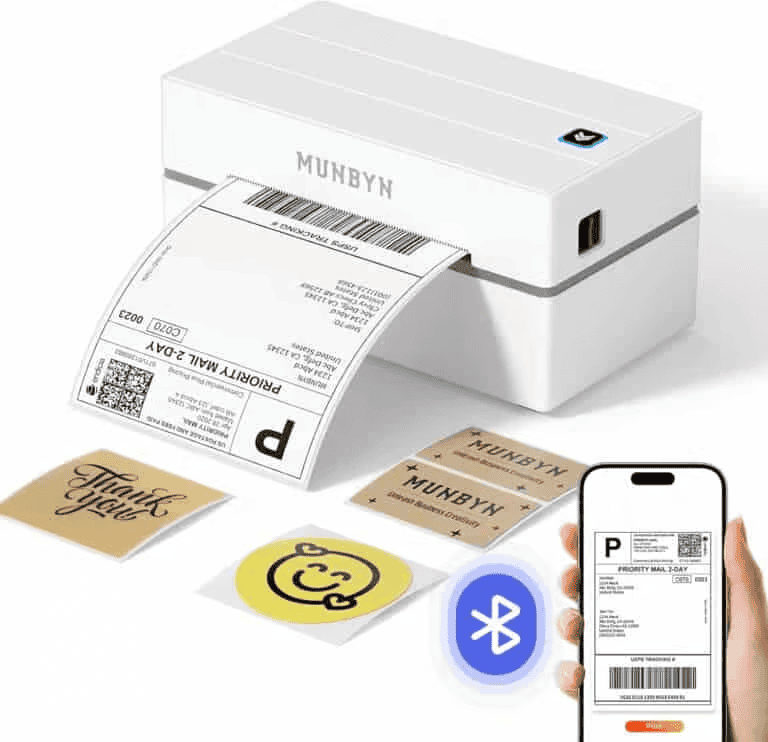
One of the most important pieces of equipment is a thermal label printer. Personally, I use two printers, one for 4×6 shipping labels and one for SKU labels. This setup speeds things up massively when processing shipments.
Thermal printers are far better than standard ink printers because:
- No ink is required
- Labels print quickly
- They are much more efficient long term
- Printing quality is consistent
You can also use an alternative label printer if your preferred model is unavailable. The main thing is making sure it works reliably and prints clearly, because poor quality labels can create problems at Amazon Fulfilment Centres.
Label holders
A label holder is another small but useful bit of kit. This keeps your shipping labels and SKU labels organised and stops labels getting damaged or curling up. It sounds minor, but once you start processing more shipments, organisation becomes extremely important.
SKU labels
SKU labels are used to cover the manufacturer barcode on products before they are sent into Amazon. This makes sure Amazon scans your product correctly against your inventory.
There are multiple types of SKU labels available, so it is always worth having backup options in case your preferred labels are unavailable. Poor quality labels can peel off or print badly, so it is worth using reliable labels from the start.
4×6 shipping labels
4×6 shipping labels are used for UPS shipment labels when sending boxes into Amazon Fulfilment Centres. Thermal printers work extremely well with these labels and make shipment creation much easier compared to printing and taping paper labels manually.
Boxes
Boxes are obviously essential when sending inventory into Amazon. The box size I personally use is 610 x 457 x 457 mm because these are versatile and can easily be cut down to size if needed.
At the start, it is important to:
- Use strong boxes
- Avoid damaged boxes
- Pack boxes securely
- Not overfill shipments
A badly packed box can create shipment issues or damaged inventory, so this part is more important than people realise.
https://www.kitepackaging.co.uk/scp/heavy-duty-cardboard-boxes/double-wall-boxes
Poly bags
Poly bags are another key part of Amazon FBA prep. Different size bags are useful for different products.
Medium poly bags are useful for:
- Toys
- Larger cosmetics
- Bulkier items
Small poly bags are useful for:
- Smaller cosmetics
- Smaller loose items
- Products needing protection
You will quickly realise that having multiple bag sizes available makes prepping much easier.
Packing tape and tape gun
Packing tape is something you will constantly use, so it is worth buying multiple rolls at once. It is cheap, essential and something you never want to run out of during shipment prep.
A tape gun is another item that saves a huge amount of time. Once you start packing larger numbers of boxes, a tape gun makes the process significantly faster and easier.
A4 SKU labels
If you already own a standard inkjet or laser printer, you can use A4 SKU labels instead of committing to a thermal printer immediately. This is a good option at the very beginning if you want to keep startup costs lower.
Long term though, thermal printers are usually much faster and more efficient.
Barcode scanner
A barcode scanner is not essential at the start, but it does make operations much smoother once inventory levels increase. It helps speed up:
- Product scanning
- Shipment building
- Inventory checking
As your business grows, little efficiency improvements like this start making a big difference.
Document scanner
A document scanner is another optional tool. While not essential, it makes it easier to:
- Scan invoices
- Store receipts
- Organise documentation
This becomes especially useful when dealing with:
- Ungating
- Authenticity complaints
- Accounting
- VAT records
Organisation is one of the biggest parts of Amazon FBA, and having clean systems around invoices and receipts becomes extremely important long term.
At the beginning, you do not need an expensive warehouse setup or highly advanced equipment. What matters most is having a simple setup that lets you:
- Prep products efficiently
- Stay organised
- Process shipments smoothly
- Save time operationally
The better your setup becomes, the easier Amazon FBA operations become. Small efficiency improvements add up massively over time, especially once shipment volume increases. Having the correct equipment from the start saves time, reduces frustration and helps create much smoother systems as your Amazon business grows.
Key takeaway: you do not need a fancy warehouse setup to start. A thermal label printer, SKU labels, 4×6 shipping labels, strong boxes, poly bags and packing tape will cover the essentials. The scanner and document scanner are nice-to-haves you can add as you grow.
Prep centre from the start?
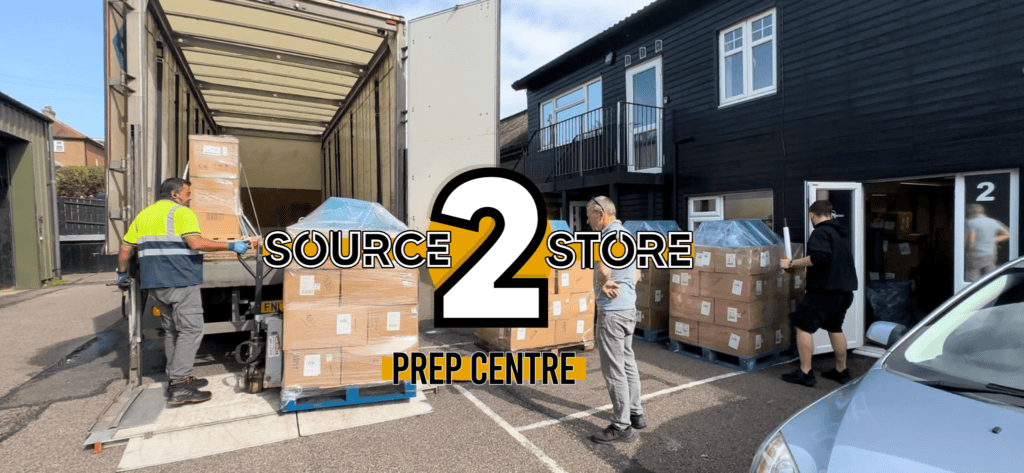
One of the most common questions new Amazon sellers ask is whether they should use a prep centre from the beginning or handle prep themselves. To be honest with you, the answer depends entirely on your personal situation, particularly your available time, budget and space. There is no single correct approach, both options work well when matched to the right circumstances.
Option one: self prep at the start
If you have a limited budget, plenty of personal time, and suitable space at home, self prepping is usually the best place to begin. Prepping yourself means receiving deliveries, labelling units, packing boxes and sending shipments directly to Amazon.
The biggest advantage here is cost control. By handling prep yourself, you keep more money inside the business, which lets you reinvest profits into stock rather than operational expenses. Early on, preserving capital is extremely important because inventory growth drives business growth.
Self prepping also helps you fully understand Amazon’s packing requirements. Learning this process firsthand gives you valuable knowledge about how shipments work, how products should be packed, and how Amazon expects inventory to arrive. A lot of sellers benefit from doing this initially before outsourcing later.
Option two: using a prep centre from day one
If you have a larger starting budget, limited free time, or little space at home, outsourcing to a prep centre from the start can make sense.
A prep centre receives your products directly from retailers, preps them according to Amazon requirements, and ships them into fulfilment centres on your behalf. This removes the logistical workload entirely.
The main benefits include:
- Systems are built for scale from the beginning
- You can focus almost entirely on sourcing
- No need to store stock at home
- Less time spent packing and shipping
This approach suits sellers who treat Amazon as a business investment rather than a hands on operation.
Downsides of using a prep centre early
There are trade offs to consider too. Prep centres charge per unit and per shipment, which reduces how much money stays within the business. This can slow early growth if your capital is limited.
You may also face flexibility issues, as some retailers will only ship to billing addresses that match your account details, meaning certain sourcing opportunities become harder to use.
Another drawback is missing out on learning the prep process yourself, which is genuinely valuable knowledge to have.
Choosing the right approach
In simple terms, the decision comes down to resources. If you have limited capital, available time and space at home, self prep is usually the smarter starting point. If you have a higher budget, limited time and want scalability from day one, a prep centre can be the better option.
Both routes lead to the same destination. The key is choosing the one that best suits your situation while letting the business grow sustainably.
UPS vs DPD for Amazon shipments
Once you have completed your shipment in Seller Central, you will usually be given the option to choose between UPS and DPD. Both are partnered carriers, but in my experience, UPS is the better option and the one I always use.
I have been using UPS for years and have never had any issues with collections, tracking or deliveries. It is reliable, consistent and integrates well with Amazon’s shipment process.
DPD, on the other hand, has been less reliable in my experience. When dropping boxes off at DPD pickup shops, there have been times where parcels have not scanned properly or there have been delays in tracking updates. This creates unnecessary stress, especially when you just want your shipment processed smoothly.

UPS drop off vs collection
With UPS, you have two main options. You can either drop your boxes off at a local UPS access point, or you can schedule a collection.
Dropping off can work well at the start if you only have one box and you are already passing by a UPS location. But it is not efficient to go out of your way just to drop off shipments, especially as your volume increases. The better option in most cases is to schedule a collection.
How to schedule a UPS collection
To arrange a collection, follow the link below to the UPS collection page.
https://wwwapps.ups.com/pickup/processverification?loc=en_GB&IP_schType=ns
Once there, you will need to enter your tracking numbers from your shipment. These are the tracking numbers generated when you create your shipment in Amazon. When entering them, separate each tracking number with a comma and do not include spaces.
After that, enter your collection details, including your address, the total weight of the shipment and any other required information. Make sure all details are accurate so the driver can collect without any issues.
You will then move through the next steps to confirm the booking. Once that is done, UPS will arrive on the scheduled day to collect your boxes directly from your location.
This method is far more efficient, especially as your business grows and you start sending multiple boxes regularly.
Key takeaway: I use UPS every time. It is reliable and integrates cleanly with Amazon. Drop off is fine when you have a single box, but scheduling a collection is the better shout once you are sending boxes regularly. Just remember to separate your tracking numbers with commas and no spaces when you book it.
Essential early settings: turn off the stuff that gets beginners in trouble
There are a few settings you want to sort out the moment your account is live. To be honest with you, these are the ones that quietly catch people out, because they are on by default and you do not realise until you are selling overseas at a loss or fielding an IP complaint from a country you never meant to sell in. So let me walk you through them.
Disabling overseas shipping (EFN)
When you are new to Amazon, shipping orders overseas just adds unnecessary complexity to your operation. You suddenly have regulations, tax considerations, longer delivery times and higher fulfilment costs to think about. Don’t get me wrong, growth into international markets can be exciting, but it is not where beginners should be focusing.
Amazon offers the European Fulfilment Network, commonly known as EFN. This lets you store inventory in one country, such as the UK, while Amazon ships the item to customers in other European marketplaces.
It sounds convenient, but EFN usually comes with higher fees, potential VAT complications and more complex returns handling. These are challenges that experienced sellers might be comfortable with, but they can be overwhelming when you are still learning the basics.
EFN is really for established sellers who understand international operations. If you do not deactivate it at the start, you can end up selling products overseas at a loss. By switching overseas shipping off, you keep your business focused on one marketplace, your profit projection stays predictable, and you avoid the admin headaches. You can always expand later once you are stable and confident.
Below are the steps to turn off international fulfilment. Follow them carefully so your offers stay available only in your chosen domestic marketplace.
Method 1: Disable EFN in Fulfilment by Amazon
This stops Amazon from offering your FBA stock to overseas customers.
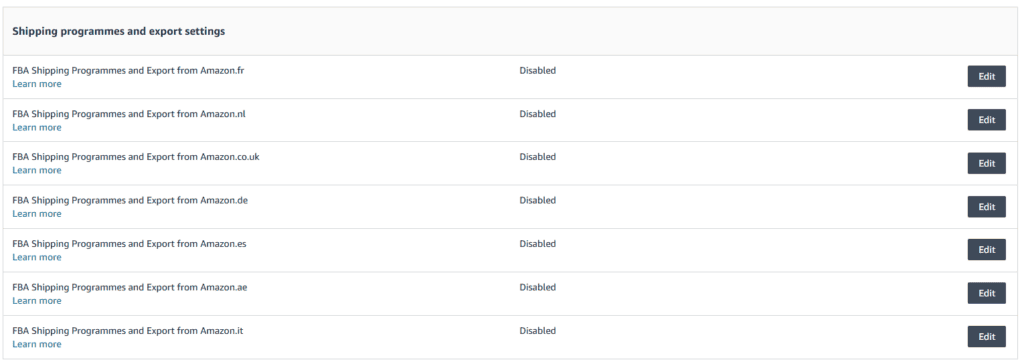
You will need to:
- Go into Seller Central
- Navigate to the cog icon
- Go into “Fulfilment By Amazon”
- Head to “Shipping programmes and export settings”
- Disable all countries (as shown in the image above).
Once disabled, your stock will only be sold in your primary marketplace.
Method 2: Activate holiday settings
Holiday settings can also be used to restrict where your listings are shown.

- Go into Seller Central
- Navigate to the cog icon
- Go into “Account Overview”
- Put each country on holiday apart from the UK
This acts as an extra safeguard and makes sure Amazon does not automatically push your listings to overseas marketplaces.
Disable Build International Listings (BIL)
When you open your seller account, you must make sure Build International Listings is not switched on. If it is active, Amazon can automatically copy your offers into other marketplaces, which might sound helpful but can quickly create problems you are not prepared for.
As a beginner, your goal should be to keep the operation tight, controlled and focused on one region. Expanding too early just adds layers of risk that are easy to avoid.
Build International Listings, usually shortened to BIL, is a tool that lets Amazon replicate your listings from one marketplace into others. It can adjust prices using currency rules and try to keep offers synchronised across regions. For established sellers with international systems, VAT registrations and strong margins, this can be powerful. For new sellers, it is a risk.
If BIL is active too early, you might find your products appearing in countries where you never intended to sell. This can lead to intellectual property complaints in other regions, tax issues in other regions and problems with Amazon’s compliance. It becomes a major headache very quickly. I experienced this myself a few years ago and it took time to clean up. It is what it is, but I would rather you did not have to deal with it.
International expansion is absolutely possible in the future. Once your operation is smooth, you are more experienced, and you understand cross border requirements, BIL can help you grow faster. Right now though, it is simply another risk to remove while you learn the foundations.
Here is how to disable it. Follow this link:
https://sellercentral.amazon.co.uk/listing-preferences/build-international-listings
If you see the screen below and it says “Get Started”, then BIL is not set up, which is correct. If it does not, you will need to disconnect the UK from each marketplace inside the BIL tool.

Join the Amazon Dangerous Goods Programme
As you set up your account, you will need to enrol in Amazon’s Dangerous Goods Programme, sometimes called the Hazmat programme. This is Amazon’s system for identifying products that could be considered hazardous during storage or delivery. Even if you are not planning to sell these types of items straight away, it is still important to understand how this works.
Dangerous goods are products that might pose a safety risk because of their ingredients, pressure, or battery content. Amazon has to follow strict transport and storage regulations, especially for items that travel by air or are stored in fulfilment centres.
Products commonly reviewed under this programme include:
- Aerosols and sprays
- Perfumes and aftershaves
- Nail polish and beauty chemicals
- Cleaning products
- Items containing lithium batteries, such as power banks
- Certain health and beauty products
Sometimes products that seem completely safe can still get flagged because of a single ingredient or component.
Amazon reviews dangerous goods to make sure products are stored, packed and shipped safely. If a product is not correctly classified, it can be blocked from sale or removed from FBA fulfilment.
When a product is flagged, Amazon may ask you to submit documents such as a Safety Data Sheet, product images and ingredient information. They then assess the risk level and decide how the product can be handled. This can be a bit annoying when it happens, but to be fair it happens rarely.
Approval into the dangerous goods programme can take a couple of weeks, so it is best to start the process early. Even if you are not selling these products yet, being approved means you will not face delays later if you decide to expand your product range. Once approved, you can sell a wider variety of items, including products that other sellers avoid because they have not bothered to complete this step.
Follow the link below to access Amazon’s dangerous goods guidance and start the application. Getting this sorted early puts you in a strong position for selling these types of products:
https://sellercentral.amazon.co.uk/help/hub/reference/GZLZBQ7W6QZRKWWK
Key takeaway: three settings to sort on day one. Turn off overseas shipping and EFN so you do not sell at a loss abroad, make sure Build International Listings is off so your offers do not get copied into other countries, and join the Dangerous Goods Programme early because approval can take a couple of weeks.
Part 6: Running the day to day
This is the part nobody really talks about, but it is where you will spend most of your time once stock is selling. None of it is complicated once you know what you are doing, but get the basics wrong and it will bite you. Here is how I handle it.
Buyer messages
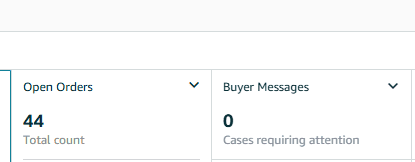
From time to time you will get messages from buyers through Amazon. It might be a simple question about a product, or it might be a complaint or someone wanting a refund. Handling these properly matters, because Amazon expects sellers to keep customer service standards up.
The big rule here is that Amazon wants every buyer message answered within 24 hours, and that includes weekends and bank holidays. Miss that window and it can hit your account health, so check your messages daily. It only takes a minute.
Dealing with complaints or refund requests
If a buyer messages you with a complaint, just respond calmly and reasonably. To be honest with you, a lot of buyers try to get a refund through messages rather than going through Amazon’s proper return system. If someone is not following the correct refund procedure, or they are just being unreasonable, you can hit Resolve Case at the bottom of the message thread.

Answering questions quickly
If a buyer is just asking for help or some product info, you can deal with it fast. A simple trick I use is to copy the buyer’s question into ChatGPT, get it to write a clear, professional reply, then paste that back into Amazon messaging. Keeps your responses quick, consistent and professional, and you stay well inside that 24 hour window.
Seller feedback, and removing negative feedback
When you are running an arbitrage business, seller feedback plays a big part in how your account performs. This is not the same as product reviews, which are about the listing itself. Seller feedback is tied directly to your account and reflects what customers experience when they buy from you.
Strong seller feedback builds trust with customers and improves your chances of winning the Buy Box. Since most sales go through the Buy Box, a solid feedback score directly affects how much you sell. Even on a competitive listing, a higher feedback rating can give you the edge over other sellers. It also feeds into your overall account health, because Amazon wants to see you are giving customers a good experience, and feedback is one of the ways they measure that.

The impact on your business
If your feedback is high, customers are more likely to trust your offer, especially when there are multiple sellers competing on the same listing. Negative feedback or a low rating does the opposite. It drops your conversion rate and makes it harder to compete. For arbitrage sellers, where you are sharing listings with other people, this matters even more. You do not control the product listing, so your reputation as a seller is one of the few ways you can stand out.
Keeping feedback strong also reduces the risk of account issues, because it shows Amazon you are consistently meeting customer expectations. One thing I have noticed, and don’t get me wrong this isn’t officially proven, but when you get a negative review the Buy Box algorithm seems to stop favouring you for a couple of days. It is not confirmed, but it does seem very consistent.
How to request seller feedback
One of the best ways to build your feedback is to ask for it consistently. You can do it manually, but most sellers automate it with software.
Tools like SageMailer let you send feedback requests to customers automatically. If you go down this route, your messages have to fully comply with Amazon’s policies. You must not incentivise reviews or use any language that tries to influence the customer unfairly. Alternatively, a lot of profit tracking tools such as SellerToolkit or Invenno have feedback requests built in, so you can ask for feedback right from inside the platform and keep everything in one place.
How to remove negative seller feedback
Here is the good news. Not all negative feedback has to stay on your account, especially if it relates to something outside of your control, like FBA fulfilment or a delivery problem that Amazon handled. Negative feedback can hit your account health, knock customer trust and affect your Buy Box share, so it is worth dealing with.
- On your dashboard, select seller feedback and go to Feedback Manager.
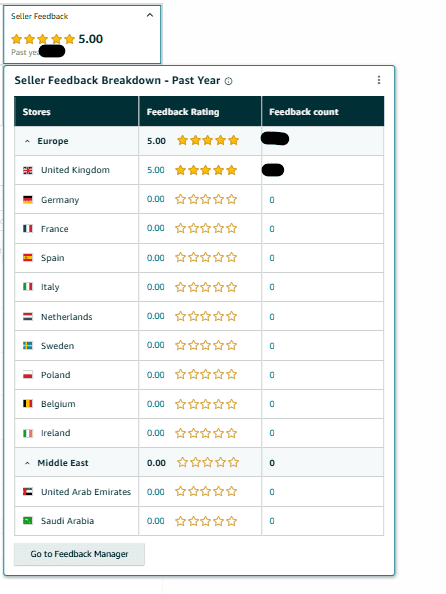
- Find the negative feedback you want to review, click into the drop down and select Request Removal.
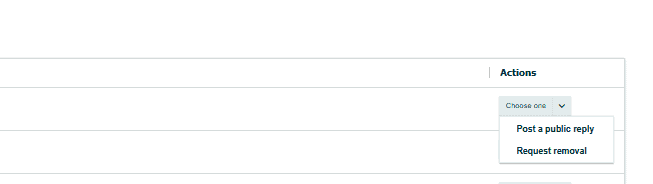
- Select that the feedback does not comply with Amazon’s policies. This will remove the feedback.
Amazon will only remove feedback that breaks their policies or relates to services they control. If the feedback is genuinely about your product or service, it might not be removable, so in that case the focus shifts to resolving the issue and keeping your service strong going forward.
Key takeaway: seller feedback feeds your Buy Box share and your account health, so request it consistently, keep your service tight, and get genuinely unfair feedback removed where Amazon controlled the fulfilment.
Invoicing done right
This is one of the most important admin parts of running an Amazon business, and it is something loads of sellers ignore until it causes a serious problem. Get your invoice details wrong and it can mess up your VAT submissions, your ungating applications, authenticity complaints and IP disputes.
To be honest with you, I have been caught out by this myself. On my first VAT return, HMRC got in touch because my company name was not showing correctly on invoices. Amazon might still accept some invoices without your company details, but HMRC will not. From a tax and compliance point of view, your invoices have to clearly show your business information. Getting this wrong creates a load of hassle that is so easily avoided from the start.
What HMRC and Amazon need to see
Invoices act as proof of purchase and proof that your business legitimately sourced the products. Both Amazon and HMRC rely on these documents, although HMRC are stricter. Your invoice must clearly link the purchase to your limited company. If your company name is missing or wrong, the invoice can be treated as invalid for accounting or verification. This becomes really important when you apply for brand ungating or respond to a policy or authenticity complaint.
Billing address vs shipping address
When you order products, especially through a prep centre, you have to understand the difference between your billing and shipping addresses. Your billing address is the critical bit for compliance. It must match the address linked to your payment card and your Amazon account exactly.
Format your billing details like this:
- Personal name
- Company name placed in the company field or address line two
- Billing address matching your bank statements and Amazon records
If you change your billing address to your prep centre address, the invoice becomes invalid for compliance. This is a really common mistake and it causes major problems later. The shipping address matters far less from a compliance point of view. That just shows where the goods are being delivered, whether that is your home or a prep centre, and it does not affect tax or verification.
Why accuracy is critical
Wrong invoices can stop you passing ungating checks, weaken your appeals against IP or authenticity complaints, and cause problems with HMRC during tax reviews or VAT inspections. Taking a few extra seconds to get your billing details right protects the business long term and stops you having to go back and fix documentation later. Proper invoice setup from day one saves you a load of time, stress and potential money down the line.
Invoicing business customers
Here is something new sellers do not always realise. Some customers need an invoice from you after they have placed an order. This happens when the buyer is purchasing through an Amazon Business account. These are business customers buying through Amazon’s business marketplace, and they need proper documentation for their own accounting.
If a business customer places an order, you are responsible for giving them an invoice. It is a requirement in Amazon’s policies, and if you do not do it within the right timeframe you can get hit with an invoice policy violation. So keep an eye on your orders and make sure invoices go out on time.
You can only provide the invoice once the payment for the order has settled. If the payment is still pending, you cannot issue it yet. Once the payment clears, the Upload Invoice option appears on the order, and that is when your 48 hour window to upload starts. You generate the invoice and upload it to the order.
If you later become VAT registered and put your VAT number into Amazon, the system generates invoices automatically for business customers, which takes the manual work away. Before you reach VAT registration though, you will usually need to create and upload these yourself. In some cases Amazon will email you offering automatic invoicing even before VAT registration. If that option is there, grab it, it saves time. If not, you do it manually.
How to identify business orders
The easiest way to track these is with profit tracking software like SellerToolkit. In your order list, business purchases are usually clearly marked as Business Customer, so you can see at a glance which orders need an invoice. Check this regularly and nothing slips through.
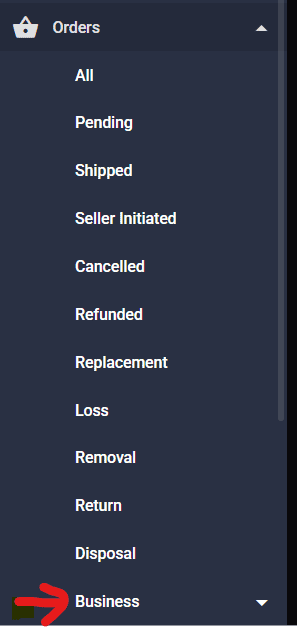
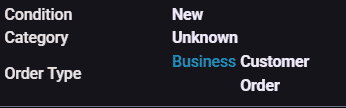
How to create the invoice
When you spot a business order that needs an invoice, here is the process.
- Use the invoice template linked here: https://wise.com/us/invoice-generator
- Fill in the required details carefully.
- Include your full company name and billing address.
- Enter the correct currency used in the order.
- Add the product title from the Amazon listing in the description field.
- Since you are not VAT registered yet, you do not need to include 20% VAT.
Once it is done, download the invoice as a PDF.
Uploading the invoice to the order
After you have generated the invoice, go back to the order inside Seller Central. On the order page you will see an Upload Invoice option. Upload the PDF you created and submit it. Amazon then sends the invoice straight to the customer through the platform.
Just remember invoices have to be uploaded within 48 hours. Submit one late and Amazon may issue a policy violation. A single violation is not usually a big deal, but repeated issues can affect your account health and become an absolute nightmare to deal with. The easiest way to avoid it is to monitor your business orders regularly and upload invoices as soon as the payment has settled.
Key takeaway: your billing address must match your card and Amazon records exactly, never your prep centre, and business customer invoices must go up within 48 hours of the payment settling.
Repricer from the start?
A repricer is a tool that automatically adjusts your prices so they stay competitive on Amazon. Prices on Amazon move constantly as sellers come and go and change their prices. A repricer watches all that and updates your price automatically so your offer stays in the running for the Buy Box.
Basically the whole point of a repricer is to help you win or hold the Buy Box without you manually checking listings all day. Instead of you sitting there adjusting prices, the software does it in the background based on rules you set. That frees you up to spend more time sourcing and growing your inventory rather than babysitting prices.
Popular repricers available
There are a few repricing tools out there. The more commonly used ones are:
- SellerToolkit
- Profit Protector Pro
- Ascent
Out of those, SellerToolkit is one of the most widely used among sellers. It is straightforward, reliable, and a lot of sellers already use it alongside the main feature. Because it is simple, it is often the first repricer people move to once their inventory starts growing.
Should you use a repricer from the start?
In my opinion, a repricer is not essential when you are first starting unless you have got a larger budget. If you are beginning with limited capital, your priority should be putting as much money as possible into inventory rather than monthly software subscriptions.
A repricer typically costs around £35 per month. That is not a huge expense, but early on every pound matters, especially while you are still testing products and learning sourcing. At the start, manual repricing on under 10 or so ASINs works perfectly well.
Manual repricing at the start
Manual repricing just means checking your inventory once a day and adjusting prices so they stay competitive with the Buy Box. With a small number of products, around 10 ASINs, this only takes a few minutes and keeps you in control of your prices. I would generally do this until you are selling around ten ASINs. At that stage, managing prices by hand is still realistic and it protects your capital while the business is growing. It also keeps your costs low while you get a feel for how pricing movement actually works on Amazon.
When a repricer becomes worth it
As your inventory grows, manual repricing quickly becomes a faff. Once you move beyond roughly ten active ASINs, prices change more often and managing everything yourself just is not feasible. That is when a repricer earns its keep. Automated pricing reacts far faster than you ever could by hand, which can lift your sales velocity and save you serious time. If you are starting with a bigger budget, say £8,000 or more, using a repricer from the beginning can make sense too, because the time you save means more time sourcing.
FBM shipments
FBM stands for Fulfilled by Merchant, which means you are responsible for storing, packing and posting products directly to the customer yourself. Unlike FBA, where Amazon handles the logistics, with FBM everything is done by you or your own setup.
Why you might need to use FBM
Even as an FBA seller, there are times when FBM becomes necessary. This can happen if Amazon’s fulfilment centres are not accepting certain products, if a listing does not allow FBA offers, or if you need to move stock quickly without waiting for FBA check in times.
The downsides of FBM
FBM has its uses, but it comes with more responsibility and stricter performance expectations. Amazon tracks your metrics closely, including delivery times, cancellation rates and customer satisfaction. If you miss a delivery or post late, your metrics can drop quickly, and it can take multiple successful orders to bring them back up. That makes it much less forgiving, especially for new sellers who are still learning.
There is also a higher risk of being taken advantage of by buyers, particularly with returns. Since you are handling fulfilment yourself, disputes and claims become more time consuming and harder to manage.
Why it is best to avoid at the start
For beginners, FBM adds complexity you do not need. It requires systems, organisation and time that most new sellers do not have in place yet. At the start, you are far better off focusing on FBA, where Amazon handles fulfilment and customer service. To be fair, even once you are more experienced, plenty of sellers still stick mainly with FBA because of how simple and scalable it is.
Adding a secondary user to your account
Adding a secondary user to your Amazon Seller Central account is a very important bit of protection to put in place early. The reason is simple. If you ever lose access to your Seller Central login, whether that is because of a linked account that has been closed, an Amazon glitch or any other crazy reason, you still have another route into the backend of the account.
Now, this will not solve an actual account suspension. If the Amazon account itself is suspended, a secondary user will not override that. But if the issue is purely with the login, it can be a lifesaver. It is one of those things that seems small until you actually need it, and then you are very glad you set it up.
Step by step guide
- First, create a separate email address that will be used only for the secondary user. I would use Gmail, as the OTPs seem more reliable than Outlook.
- Make sure you also have a mobile number ready for that secondary user login, because Amazon requires OTP verification during setup and when signing in. A simple option is to buy a cheap SIM from your local supermarket, put it into a spare phone, and keep that number purely for this backup access.
- The secondary user should be set up as a real person, not a fake name, because you have to verify this from inside Seller Central. This can be a trusted relative, partner or close friend, but it needs to be someone genuine, as Amazon asks for identification and verification details.
- Log into Amazon Seller Central as the primary user, then go to the following link: https://sellercentral.amazon.co.uk/account/permissions#/user-management/users
- On the User Permissions page, select “add employee”.
- Then select “invite employee”.

- Now input the details of the secondary user. This will send an invite to the user.
- Go to the inbox of the secondary user email and open the Amazon invitation. Follow the instructions in the email to accept the invite and create the login for that user. Amazon states that the invited user must follow the instructions in the email to complete setup.
- Once the invitation has been accepted, go into Seller Central and verify the user for the United Kingdom. This is where you will need to verify identification.
- Once verification is complete (this can take a few days), assign the permissions you want that user to have. Grant the user admin access, you will have to click “admin” on each table.

- Finally, test the login properly. Sign out, log in through the secondary user details, and make sure the two step verification works, the email works, and the permissions are correct. There is no point setting this up if you do not test it.
Setting up a business buying account

When you create an Amazon Business account, it is very important that you separate your Amazon buying activity from your Seller Central login. This is something a lot of new sellers overlook, but it can cause serious issues if you get it wrong.
When you create your Seller Central account, it is linked to an Amazon account, and this can sometimes be an Amazon Business account. This is the login you use to access Seller Central. You must not use this account for sourcing or placing orders. It should stay untouched.
The reason is simple. If anything happens to your buying account, for example it gets flagged, restricted or locked, this can affect your ability to log into Seller Central. In some cases you may lose access entirely, which is something you want to avoid at all costs. To prevent this, you should set up a completely separate Amazon Business buying account.
When creating this new account, you can use the same company details, but you must use a different email address and a different mobile number. This makes sure the account is not linked to your Seller Central login and keeps everything separate.
During the setup process, Amazon may require identity verification. Sometimes you will be approved straight away, but in many cases you will either need to complete KYC checks during setup or be asked to provide documents shortly after.
If you are operating as a limited company, you will typically need your Companies House registration document and a business bank statement. If you are operating as a sole trader, you will usually need your UTR number and a bank statement. Once the account is set up and verified, use this Amazon Business account for all your sourcing and purchasing.
Key takeaway: keep your buying account completely separate from your Seller Central login. Same company details are fine, but use a different email and mobile number, and do all your sourcing through the buying account. If your buying account ever gets flagged, you do not want it taking your Seller Central access down with it.
Amazon account health
Account health is one of the most important parts of your Amazon business, and it is something most new sellers overlook. You can be doing really well, making sales and building momentum, but if your account health drops, everything can stop overnight. Trust with Amazon matters. If your account is strong, you get rewarded with visibility, Buy Box share and consistent sales. If your account weakens, you lose traction, lose Buy Box, and in the worst cases you get suspended. This is not something you check once a week. It is something you stay on top of constantly.
How Amazon measures account health
Amazon looks at three main areas:
- Customer service performance
- Policy compliance
- Delivery performance (mainly FBM)
As an FBA seller, most of your focus is customer service and policy compliance. You have also got your Account Health Rating, which is Amazon’s overall score of how your account is performing.
Customer service performance
This is mainly your Order Defect Rate, which includes negative feedback, A-to-z claims and chargebacks. Amazon wants this under 1 percent. Even with FBA, you still control product quality and whether the item matches the listing. At low volume, one issue can spike your metrics quickly, so early on you need to be careful with what you sell and how you deal with customers. Reply to messages within 24 hours, keep things simple, and resolve problems fast.
Policy compliance
This is where most arbitrage sellers run into problems, and it is the most important section to understand. Policy compliance covers:
- IP complaints
- Authenticity complaints
- Product condition complaints
- Restricted product issues
- Listing violations
The big two are IP and authenticity complaints. You can buy a product completely legitimately and still get an IP complaint, because brands are protecting their distribution, not just authenticity. Authenticity complaints are more serious. This is where Amazon wants proof the product is genuine.
This is exactly why your setup matters:
- Proper VAT invoices
- Correct company name and billing address
- Reputable suppliers
- A clear link between the purchase and the product
If your invoice is wrong or from a poor supplier, your appeal can fail even when the product is genuine.
Handling policy issues
If you get a complaint, deal with it straight away.
- Understand the issue.
- Stop selling the product if needed.
- Gather your invoice.
- Respond clearly.
- Explain what happened and what you have changed.
Sometimes you will need to keep pushing. Reopen cases, ask for a human review, provide more proof. It is a lot like ungating, persistence matters. You cannot take no for an answer.
Voice of the Customer
This is another area people ignore. Amazon tracks returns and customer experience. If a product has high returns or poor feedback, Amazon may pull you up on it. Usually this comes down to poor products, or listings that do not match what the customer expected.
Delivery performance
For FBA sellers, Amazon handles delivery, which removes a load of risk. FBM sellers have to manage late shipment rate, tracking and cancellations, which is exactly why FBA is preferred. The key is being proactive:
- Check account health regularly
- Respond to messages quickly
- Keep invoices organised
- Avoid risky brands early
- Fix issues immediately
Account health directly affects your performance. A strong account gets you more Buy Box, more visibility and more sales. A weak account gets you less Buy Box, slower listings and lower sales. Amazon prioritises reliable sellers, it is as simple as that.
Arbitrage is powerful, but it comes with risk. You are selling other brands on shared listings using third party suppliers. Because of that, compliance is your biggest challenge but also your biggest edge. Most people fail here because they ignore it or do not understand it. Account health is the backbone of your business. It controls your ability to sell, your visibility and your long term growth. Manage it properly and you can outlast most sellers. Stay organised, stay compliant, stay consistent. That is what keeps you on the platform long term.
Key takeaway: account health is the backbone of the whole business. Keep your Order Defect Rate under 1 percent, treat IP and authenticity complaints as the priority, and never take no for an answer when you appeal.
Winning the Buy Box
Winning the Buy Box is one of the most important parts of selling on Amazon, especially as an arbitrage seller. The majority of sales go through the Buy Box, so if you are not winning it, your chances of making consistent sales are much lower. Amazon does not publicly confirm exactly how the Buy Box algorithm works, but over time sellers have worked out the key factors that strongly influence who wins it. It is not just about price. It is a combination of performance, trust and consistency.
Key factors that influence the Buy Box
One of the biggest factors is price. You need to be competitive with the other sellers on the listing. You do not always have to be the cheapest, but you need to be within a reasonable range to stay in rotation.
Fulfilment method also plays a major role. FBA sellers almost always have the advantage, because Amazon handles delivery and customer service. FBM sellers can win the Buy Box, but usually only if they are very strong sellers with excellent metrics.
Seller feedback is another important factor. The more positive feedback you have, the more trust Amazon places in your account. A higher rating and more reviews increase your chances of winning the Buy Box.
Stock levels show clear patterns too. Sellers with more stock available tend to win the Buy Box more consistently. Amazon prefers sellers who can keep availability up and avoid going out of stock.
Being early on a listing can also help. If you are one of the first sellers on a product, you often get a strong share of the Buy Box before the competition rolls in.
Replenishment history is another factor. If you consistently restock a product and stay on the listing over time, Amazon starts to recognise you as a reliable seller for that ASIN, which can improve your Buy Box share.
Additional factors
Your IPI score and overall inventory health contribute indirectly. A well managed account with strong inventory performance supports better standing within Amazon’s system. Your account health metrics, like violations and authenticity complaints, also play a role. Even as an FBA seller, keeping a clean account is essential.
The bigger picture
Winning the Buy Box is not about one single thing. It is about consistency across all areas. Competitive pricing, strong feedback, reliable stock levels and good account performance all work together. The more consistent you are, the more Amazon trusts your account, and the more Buy Box share you win over time.
IPI score, stranded and unfulfillable inventory
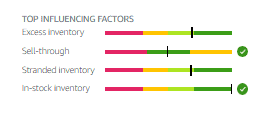
The Inventory Performance Index, or IPI score, is made up of a few key metrics Amazon uses to judge how well you are managing your FBA inventory. As an arbitrage seller, it is worth understanding each one. The main areas that make up your IPI score are sell through rate, excess inventory, stranded inventory and in stock rate.
Sell through rate
Sell through rate is one of the most important metrics for arbitrage sellers. It measures how quickly your inventory sells compared to how much stock you are holding. A high sell through rate means your products are moving quickly, which is exactly what you want in arbitrage. If your sell through is low, it means you are sitting on stock for too long, which ties up cash and drags your IPI score down. The goal is to keep products moving and avoid slow inventory. Get it in, get it sold, get it churned.
Excess inventory
Excess inventory is stock Amazon predicts will not sell within a reasonable time frame. This is usually caused by overbuying, or buying products with weak demand. For arbitrage, this often comes from going too deep on a product without properly checking sales per month and competition. Keep your buying tight and focus on fast selling products and you will avoid building up excess stock.
Stranded inventory
Stranded inventory is stock that is in Amazon’s fulfilment centres but cannot be sold because of a listing issue. This could be because the listing has been closed, deleted by you, or you have been restricted from selling the product. This metric is fully within your control, and it should always be kept as close to zero as possible. Fix stranded listings quickly or remove the stock, and it will not drag your score down.
In stock rate
In stock rate measures how often your best selling products are available to buy. To be fair, this metric is pretty much irrelevant for us arbitrage sellers, because most of the time we cannot replenish.
Why this gets overlooked
A lot of sellers ignore IPI until it becomes a problem. It is not a direct Buy Box factor, but it supports your overall account performance. A healthy IPI score keeps your storage costs low, your cash flow healthy and Amazon happy.
Stranded and unfulfillable inventory, and how to deal with both
As you start sending products into Amazon, you will eventually come across two important inventory types, stranded inventory and unfulfillable inventory. Both need action, and if you ignore them they can lead to lost stock, storage fees or missed sales.
Stranded inventory is products sitting in Amazon’s fulfilment centres that are not currently sellable because something is wrong with the listing. Unfulfillable inventory is products that cannot be sold in their current condition, usually because of damage or returns.
Why inventory becomes stranded
There are a few common reasons inventory becomes stranded. It can happen if a listing is deleted, closed or suppressed, if a product becomes restricted again, or if there is an authenticity or policy complaint that removes your ability to sell that item. It can also happen if you manually close a listing, or if there is an error in the listing information. When this happens, your stock is still sitting in Amazon’s warehouse, but it is not active and nobody can buy it.
To fix it, go to Inventory, then Manage Inventory, and look for the Stranded Inventory section. From there, Amazon will usually give you options like relisting the product, fixing the issue, or creating a removal order.
Understanding unfulfillable inventory
Unfulfillable inventory is stock Amazon cannot sell. This is most commonly caused by customer returns, where the item has been opened, damaged or is no longer in sellable condition. It can also include items damaged in the warehouse or in transit. These units sit in your unfulfillable inventory until you decide what to do with them. To manage it, go to Inventory, then Manage FBA Inventory, and filter for unfulfillable items.

Removal settings and process
For both stranded and unfulfillable inventory, you have the option to create a removal order. This lets you have the products returned to you or disposed of. Select the affected inventory and choose Create Removal Order. You then choose whether you want the items returned to your address or disposed of by Amazon. Make sure your removal address is set correctly in your settings first. That can be your home address, a unit, or a prep centre.
Once submitted, Amazon processes the removal and ships the items back to you. This can take several days or longer depending on volume. Staying on top of stranded and unfulfillable inventory means you are not leaving money sitting there and you are avoiding unnecessary storage costs.
Key takeaway: keep your sell through rate high, keep stranded inventory as close to zero as you can, and clear unfulfillable stock with a removal order so your cash is not just sitting in a warehouse.
Getting paid: withdrawals and payment timing
Cash flow is one of the most important parts of running an FBA business, especially if you are starting with a limited budget. Even if your products are selling quickly, the delay between a sale and the money landing in your bank account can slow down how fast you reinvest into more stock. So you need to understand how Amazon pays you, and you need to get that money out as soon as you can.
What happens after you make a sale
When a customer buys your product, Amazon does not release the money to you straight away. First, the customer’s payment needs to clear, and in most cases that takes a couple of days. Business customers can take up to seven days to fully process, which is less common but still possible. After the payment clears, the money moves into what Amazon calls deferred transactions.
What are deferred transactions
Deferred transactions are funds Amazon temporarily holds before making them available for payout. This holding period lets Amazon cover things like returns, refunds, or chargebacks. Typically, funds stay in deferred status for around seven to ten days. During that time the money is not available to withdraw, even though the sale is done.
You can see this inside Seller Central by going to the Payments section and clicking the Deferred Transactions tab. There you will see a breakdown of which orders are being held and the estimated dates they get released. It is a useful area to keep an eye on, especially when you are managing cash flow.
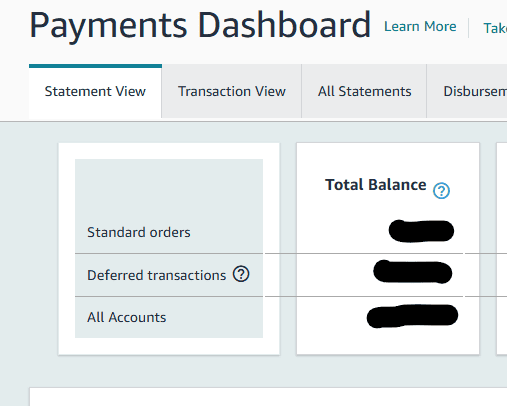
When the money reaches your bank
Once funds leave deferred transactions, Amazon includes them in your next payout. After Amazon sends the disbursement, it usually takes around three working days to reach your business bank account, depending on your bank. So in total, from the moment a customer pays to the money landing in your account, it can take roughly two weeks. Understanding that delay helps you plan your stock purchases and avoid getting caught short on cash flow.
Why you should withdraw daily
Withdrawing your Amazon balance regularly is really important when you are building a business that lives on cash flow. The faster money comes back to your bank, the faster you can reinvest it into new inventory. Leaving funds sitting inside Amazon does you no favours. That money cannot buy stock, pay suppliers or cover expenses while it is stuck in your seller balance. More importantly, if your account ever gets restricted, reviewed or temporarily suspended, your funds can get tied up in that process.
For that reason, I withdraw available funds daily, and a lot of experienced sellers do the same. It keeps cash flow consistent, reduces your risk, and keeps your working capital under your control. Your Amazon account is there to sell products, not to store your money.
Step by step guide to withdraw funds
- Go to the menu bar, head down to Payments and click on Payments.
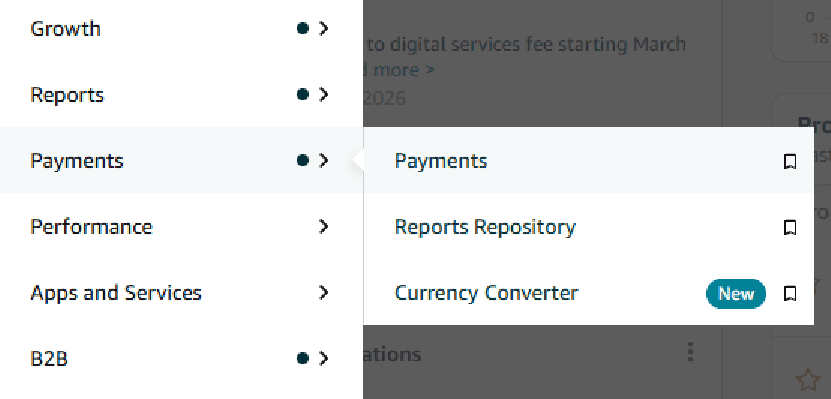
- Select Request Payment.
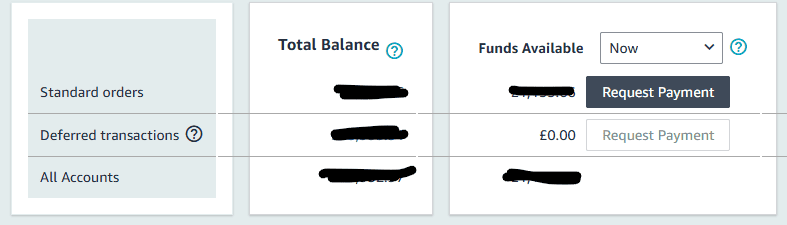
- Hit the disbursement button. It is grey when unavailable but green when available, and this withdraws the funds to your account.
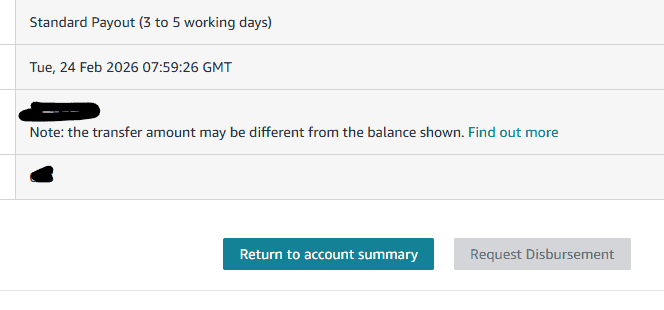
Key takeaway: from sale to bank can take roughly two weeks once you factor in payment clearance, seven to ten days of deferred transactions, and three working days for the disbursement, so withdraw your available balance daily to keep your cash working.
Ungating
I will be honest with you, ungating is by far the hardest part of starting on Amazon, and it is where most sellers give up. When you start, one thing becomes clear very quickly. You will get rejected, and often. That is completely normal, especially for new accounts with little selling history. Amazon’s system rejects loads of applications automatically with bots, and the reasons it gives are not always helpful or accurate. You can have a perfectly correct invoice and still get a generic knock back. It is an absolute nightmare, but persistence is everything here. You cannot take no for an answer.
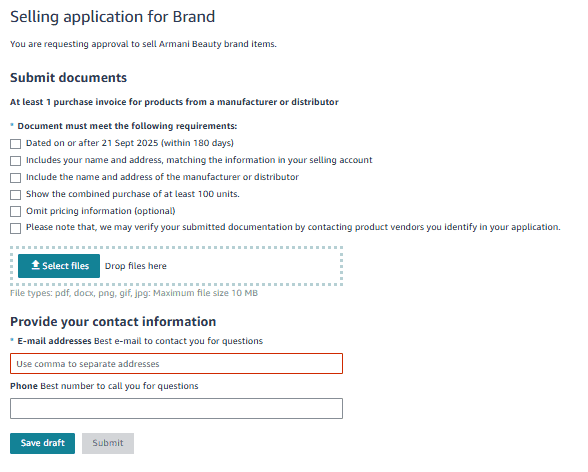
Before you start hammering the resubmit button though, your fundamentals have to be right, or no amount of persistence will fix it. Your company name needs to match exactly across your invoices, Amazon and your bank. Your billing address needs to match your card details, and it cannot be your prep centre address. The supplier needs to be a legitimate, reputable retailer or wholesaler, the invoice needs to be a proper VAT invoice, and the quantity needs to meet Amazon’s requirement, usually 10 to 100 units. At the start, focus on brands that only need around 10 units, because they are easier to access and need less upfront capital. The big well known brands often want 100 units and are much harder, so leave those until your account is stronger.
Get all that right and in theory you should be eligible. The real fight is getting past the bots, and that comes down to applying again and again through the same application, requesting a human review, and backing it up with photos of the products next to the invoice plus a bank statement. It gets a lot easier after two to three months of consistent selling, and you may even start getting auto ungated without applying.
There is a lot more detail to this, including the exact message I send to request a manual review and my recommended suppliers for ungating in each category. I have put the full step by step process in a dedicated guide here: how to get ungated on Amazon UK.
Key takeaway: ungating is the biggest barrier to entry, which is exactly why it is so valuable. Get your fundamentals right, then keep applying. You cannot take no for an answer.
Part 7: Managing your money and cash flow
Cash flow is what separates the sellers who grow from the ones who stall, so let us talk money properly, your cash flow, your overheads, your real profit, using credit sensibly, and when to register for VAT.
Cash flow, the thing that catches everyone out
If there is one thing I want you to take away from this whole guide, it is to respect your cash flow. It is one of the most important parts of running an Amazon business and it is also the bit beginners overlook the most. When you first start, it is dead easy to fixate on profit, products and sales. But without cash flow behind you, none of that really matters.
The thing is, e-commerce is naturally a negative cash flow model. You pay for stock upfront, you send it into Amazon, you wait for it to sell, and then you wait again to actually get paid out. So there is always a gap between the money going out and the money coming back. That gap is where all the pressure comes from, basically.
Why it catches beginners out
At the start, loads of people underestimate this. You make a few sales, you think the business is flying, and then you realise your money is all tied up in stock and Amazon payouts. Suddenly you cannot reinvest and you cannot keep growing. It feels like being stuck even though, on paper, things are going fine.
The other classic mistake is overbuying or buying slow movers. That locks your cash into inventory that just sits there. And here is the bit that does people’s heads in: you can be technically profitable and still feel completely skint, because the cash simply is not available when you need it.
The problem and the fix
The real problem with cash flow is timing. The money is always moving, but it is not always there when you want it, and that is what stops most sellers from scaling. The fix is pretty simple to say and harder to do. Focus on fast moving products where you can, keep your overheads low, and reinvest consistently. Get your head around Amazon’s payment cycle too, because once you know when the money is coming back in, you can plan your buying around it.
Over time, as your stock turns faster and your buying gets sharper, cash flow gets easier to manage. But at the start it is one of the biggest challenges, and getting it right is what separates the people who grow from the people who get stuck. This is exactly why I bang on about “get it in, get it sold, get it churned.” Keep the wheel turning.
Key takeaway: you can be profitable and still feel broke if your cash is locked up in slow stock. Buy things that sell, keep overheads tight, and keep churning. Cash flow is the game.
Managing your overheads
One of the most common mistakes I see is people taking on way too many overheads way too quickly. Don’t get me wrong, software and tools are essential for running this properly, but it is so easy to stack subscription on top of subscription and suddenly your monthly costs are way higher than you expected.
That is a real problem early on, because your capital should mostly be going into stock. Stock is what generates sales and grows the business. Every extra tenner a month going out on a tool you are barely using is a tenner that is not buying you inventory.

The tools you will likely need
There are a handful of tools most Amazon sellers lean on to run things properly:
- Keepa – for analysing price history and sourcing
- SellerAmp – for scanning products and working out profitability
- SellerToolkit – for tracking your metrics and monitoring orders
- A repricer – to automatically adjust your prices and stay competitive
- (Optional) sourcing groups – Discord or lead groups that send you product leads and pings
These help you make better buying decisions and keep on top of how you are performing. They earn their keep, but only if you are actually using them.
Expect a small loss early on
In your first month or two, it is completely normal for the business to show a small loss. That is just because you are paying for software, learning the ropes, and buying stock that has not sold yet. To be fair, that is not a red flag, it is just the setup phase. As long as the business is moving forward, do not panic about it.
The goal by month three
By around month three, the aim is to reach the point where the profit from your sales is bigger than your overhead costs. That is the point where the business becomes sustainable and starts to grow, because the money left over after your overheads goes straight back into inventory.
If your overheads stay higher than your profit, the business slowly shrinks, because you are bleeding money every month. So managing this balance early really matters.
Key takeaway: do not stack subscriptions you are not using. Aim to have your sales profit beating your overheads by about month three. That is when it starts to compound instead of shrink.
Net profit, the only number that matters
One of the biggest mistakes new sellers make is misunderstanding what their actual profit is. It is dead easy to glance at the big numbers, especially the big circles you see in tools like SellerToolkit, and assume that is the money you have made. To be honest with you, I get why people do it, those numbers look lovely.
But while those figures do represent profit from sales, they do not tell the full story. They do not include all your expenses, which means they are not your true profit.
The difference between gross and net
The big circles are basically your gross profit. That is your profit before all your expenses are properly accounted for. It looks great on the surface, especially as your sales climb, but it does not reflect what you are actually keeping in the business.
The number that genuinely matters is your net profit at the end of each month. That is the figure once everything has been taken off, including:
- Amazon fees
- FBA fulfilment costs
- Shipping and transportation
- Software subscriptions
- Advertising costs if you are running any
- Any other business overheads
Once all of that is deducted, what is left is your real profit. That is the number, not the big circle.
Track your expenses properly
To get an accurate net profit figure, you have to log all your expenses into your profit tracking software at the end of every month. If you do not, your numbers are basically lying to you. Keeping everything recorded means you always know exactly where the business stands.
What to expect at the start
At the beginning, it is normal for your net profit to be low or even negative. Again, that is the software, the learning, and building your inventory. Over time, as your sales grow and you get more efficient, your net profit should move into the green. That is the real sign the business is working.
Key takeaway: the big circle is gross. Net profit, after fees, FBA, shipping, software and everything else, is the only number that actually matters. Log every expense or you are kidding yourself.
Capital on Tap, Amex and credit
Quick disclaimer before I start: this is not financial advice, this is purely based on my own experience. Credit can be a seriously powerful tool in e-commerce, but it can also land you in proper trouble if you use it wrong. You should only even think about credit once you fully understand cash flow, Amazon payment times, and how money moves through your business. If you do not understand your cash cycle yet, credit will put you under pressure fast. Playing with fire, basically.

Why credit matters in e-commerce
As we covered, Amazon FBA is a cash flow heavy business. You are constantly buying stock upfront, sending it in, waiting for it to sell, then waiting again to get paid out. Your money is always tied up. If you only ever use your own capital, growth can be slow. Credit, used correctly, lets you bridge that gap and scale faster by buying more inventory while you wait for your payouts to land.
At the very start though, the safest move is to just loan your business your own money in small amounts. That lets you learn the process without any risk. Once you are confident and you genuinely understand the model, then you can start looking at credit strategically.
American Express and Capital on Tap
Two of the most commonly used options for Amazon sellers are American Express and Capital on Tap. Both do business credit cards with flexible payment terms and rewards.
Amex is widely used because of its good payback times, strong customer service and reward system. Depending on your card, you can get extended payment terms, which helps you line your repayments up with Amazon’s payout cycle.
Capital on Tap is the other popular one. It is often easier to get hold of and works nicely alongside Amex, though you do need to be a limited company to register. One of the perks of running both is that you can stagger your payment dates, which makes repayments much easier to manage. Capital on Tap is also crucial if you are buying from Amazon EU.
Benefits and rewards
Both cards usually offer points, cashback or rewards on your spending. That should never be the main reason you use them, but it is a nice extra over time, especially when you are putting serious inventory spend through them. More importantly though, they let you scale. Instead of sitting around waiting for one cycle of cash to come back, you can keep buying stock and keep the business moving.
What to avoid
Avoid high interest loans at all costs. A lot of loan providers, including some linked directly to Amazon, charge high interest rates that will absolutely eat into your already tight margins. Arbitrage margins are not big enough to soak up unnecessary interest payments, so do not do it.
Used properly, credit can be a real turning point. I personally noticed a big difference in my business when I started using Amex and Capital on Tap. It let me increase stock, improve cash flow and scale much faster. But, and this is the important bit, it only works if you understand your numbers and stay disciplined. Credit should support your business, not run it.
Key takeaway: credit is a tool, not a toy. Only use it once you understand your cash cycle. Amex and Capital on Tap (you need to be LTD for that one) are the sensible options, staggered payment dates help, and you steer well clear of high interest loans.
Using TopCashback

What it is and why it matters
TopCashback is a cashback platform that pays you money back on purchases from loads of different retailers. As an OA seller, this is a simple way to bump up your margins without changing your sourcing at all. When you are placing regular orders for stock, even small cashback percentages add up over time and feed straight into your overall profit. Free money on stuff you were buying anyway, basically.
Use the browser extension
The easiest way to use TopCashback is to install the Google Chrome extension. Once it is in, it automatically tells you when cashback is available on a retailer you are visiting. No more manually checking the site every time, and you do not miss out when you are sourcing. This is also where you activate the cashback, so make sure you do. It just becomes part of your workflow, especially when you are placing a lot of orders, and it squeezes out a bit more return for almost no effort.
Withdraw it or turn it into vouchers
Once your cashback has tracked and become payable, you have two options. You can withdraw it straight into your bank account, or convert it into gift vouchers. In a lot of cases, converting to vouchers gives you a small bonus, so you get slightly more value than just taking the cash. Handy if you fancy buying a few gifts or putting it towards a treat.
Tax considerations
It is worth understanding the tax side here. If you convert your cashback to vouchers, that will not be taxed. If you withdraw cashback into your bank account, especially at scale, you need to track it properly because of the tax on the withdrawals. So keep records of your cashback activity and have a quick word with your accountant if you are unsure how it should sit within your accounts. Just keep it clean and reported correctly.
Time to register for VAT?
Understanding the VAT threshold
In the UK, once your business hits £90,000 in revenue within a rolling 12 month period, you are legally required to register for VAT. The bit people get wrong here is that this is your total sales revenue, not your profit. So even if your margins are tiny, the second your turnover passes £90,000, you have to register.
For most Amazon sellers, the best move is to wait until you actually reach the threshold rather than registering early. Registering too soon just piles on admin and messes with your pricing before the business is ready for it. Waiting lets you grow first and then deal with VAT once the revenue genuinely justifies the extra work.
That said, start preparing before you hit the limit. Once your revenue is creeping up to around £80,000, get in touch with an accountant so everything is ready when it is time to register.
Working with an accountant
When you get near the threshold, an accountant will walk you through the registration and make sure your accounts are set up properly. The accountants I personally use are RT Accounting. They are seriously experienced with Amazon sellers and they actually understand how the platform works, which makes a massive difference.
Once you speak to your accountant, they will usually get you to download accounting software like Xero, along with Link My Books. These two work together to keep your records organised and automatically pull your Amazon sales data into your accounts.
Once the software is set up, you will need to go back through your past transactions and reconcile them inside Xero. Reconciling just means matching your bank transactions to the relevant purchases, expenses or sales, so your accounts are accurate and up to date. If you have never done bookkeeping before, this bit can take a while, but it is an important part of getting your accounts ready before VAT registration. This is exactly why I tell you from day one to save every invoice and keep a proper buy sheet. It pays off right here.
Keeping all your invoices and receipts
One of the best habits you can build as a seller is keeping every single invoice and receipt. This becomes especially important as you approach VAT registration.
When you register for VAT, you can reclaim VAT on eligible purchases you made before your registration date. For goods like inventory, expenses and subscriptions, you can usually reclaim VAT on purchases made up to six months before registering.
So if you have kept all your invoices properly, you might be able to claim back a decent chunk of VAT you paid before you were even registered. This is why a lot of sellers actually get a refund on their first VAT return. But it only works if your documentation is right. Every purchase should have a proper invoice showing the supplier, your company details, and the VAT breakdown where it applies.
Adjusting your SellerAmp settings
Once your VAT registration goes active, you have to update the settings in your sourcing tools so your profit calculations stay accurate. In SellerAmp, change the VAT setting to Standard VAT. This tells the software to factor VAT into your calculations correctly when you are analysing products.
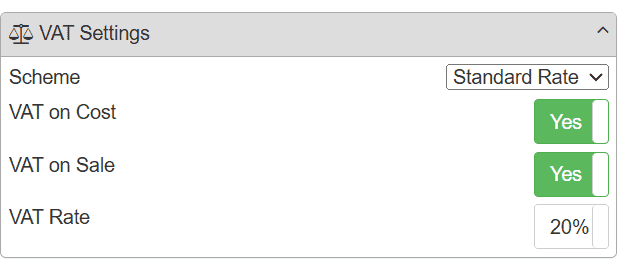
Under standard VAT accounting, it works like this. You reclaim the VAT you pay on eligible purchases, which is normally 20 percent. When you sell the product, you charge VAT on the sale price, which is also 20 percent. The difference between the VAT you collected and the VAT you paid is what gets reported to HMRC.
SellerAmp builds this into the calculation when you switch the setting to Standard VAT, so you can see your true profit after your VAT obligations. You will also need to input your VAT number in Amazon using the following link:
https://sellercentral.amazon.co.uk/gc/amazon-business/tax-settings
Submitting VAT returns
Once you are registered, your business needs to submit VAT returns every quarter, so every three months. These returns report how much VAT you collected on your sales and how much you paid on your purchases. Your accountant will normally prepare and submit these for you, but it is still on you to keep your bookkeeping organised.
If your transactions are reconciled regularly inside Xero and your invoices are stored properly, the whole VAT process becomes much easier. Keep your accounts clean and up to date and, when returns are due, the information is just there and ready. No last minute scramble, no stress.
Key takeaway: VAT kicks in at £90,000 of revenue (not profit) over a rolling 12 months. Wait until you hit it, but start prepping around £80,000. Keep every invoice, because you can reclaim VAT up to six months back, and switch SellerAmp to Standard VAT once you are registered.
Part 8: Where you could be in six months
Let us finish with where this can actually take you, because the early weeks can feel slow and it really helps to see the bigger picture.
The realistic six-month picture
The reality of progress
When people start on Amazon, they fixate way too much on what they can make in the first week or the first month. In reality, the real growth comes from what happens over time. As the saying goes:
“First year for learning, second year for earning.”
Six months is where things can start to look very different, but only if you go about it the right way and stay consistent.
At the start, it can feel slow, and that is normal. You are learning sourcing, dealing with ungating, getting your head around pricing, working out how it all fits together. Your profits might be small, and honestly the first month or two might even be negative once you factor in software and setup costs. That is not failure, that is just the process. Everyone goes through it.
The power of compounding
The real shift happens when you start reinvesting everything back into the business. Instead of pulling money out, you roll it straight back into stock. That is where compounding kicks in.
If you start with a few thousand pounds and keep reinvesting your profits, your buying power grows every single cycle. More stock leads to more sales, more sales lead to more profit, and that profit goes straight back into more inventory. Do that over and over and you build proper momentum.
It is not about flipping stock for a quick hit. It is about repeating small, profitable decisions again and again. That is genuinely how Amazon scales. Get it in, get it sold, get it churned, then do it again with a bigger bank behind you.

What six months can look like
If you stay consistent, keep your overheads under control, and keep reinvesting, six months in you could be in a completely different position. You might have:
- A much larger inventory base
- Consistent daily sales
- Better access to brands through ungating
- Improved cash flow
- Systems in place that make the business run smoother
Stuff that felt difficult at the start, like ungating or finding profitable products, starts to become second nature. You will also notice you are getting auto ungated on brands and finding opportunities quicker. It all just gets easier the more reps you put in.
The mindset that gets you there
The key to reaching this point is mindset. You have to treat this as a long term process, not something that pays out instantly. The biggest mistake people make is taking money out too early, or losing consistency the moment things feel slow.
So reinvest everything at the start. Keep your money working inside the business. Stay disciplined with your sourcing, track your numbers properly, and keep improving a little each week. There will be challenges, especially early on, but if you keep pushing through and focus on growth rather than quick wins, the compounding does the heavy lifting for you.
Six months done properly can completely change your position. But, and I mean this, only if you stay consistent and commit to the process. And remember, 20% ROI in your first month is amazing, so do not beat yourself up chasing perfection. You have made money on Amazon. That is a brilliant start. Build on it.
Key takeaway: first year for learning, second year for earning. Reinvest everything early, keep churning, and let compounding do the work. Consistency beats a fast start every single time.
Common beginner mistakes to avoid
I have watched a lot of people start on Amazon, and the ones who struggle nearly always trip over the same handful of things. Get these out of the way now and you are ahead of most.
Starting with private label or wholesale
This is the big one. New sellers see the big turnover numbers online and jump straight into private label or wholesale, then tie up thousands in stock before they even understand how Amazon works. Learn the platform with online arbitrage first, where you can return a mistake, then look at the others later. If you are tempted by private label, read my 5 key private label mistakes first.
Chasing gross profit instead of net
The big number in your profit software is not your profit. Once Amazon fees, FBA fees, VAT and your overheads come off, the real figure is a lot smaller. Track net profit from day one, or you will think you are doing well while actually going backwards.
Overbuying and strangling your cash flow
It is so easy to find one product you like and pour everything into it. Don’t. Spread your money, buy in sensible quantities, and keep cash free to jump on the next deal. The money is made in the buy, not the sell, but only if you have got cash to buy with.
Getting sloppy with invoices and account health
Keep every invoice, make sure your company name and billing address match everywhere, and treat your account health like the most important number in the business, because it is. A weak invoice or an ignored complaint can undo months of work.
Trying to run multiple accounts
Please do not do this. Amazon is very good at linking accounts, and a second account is one of the fastest ways to get yourself banned. One account, kept clean, is worth far more than any clever workaround.
Taking your money out too early
The first few months are for reinvesting, not for paying yourself. Roll your profit straight back into stock and let it compound. Take too much out too soon and you stall the very thing that grows the business.
Frequently asked questions
How do I start Amazon FBA in the UK?
Honestly, the whole guide above this is your answer, so have a proper read through it from the top. The short version is you set up a limited company, register for a Professional Amazon seller account, get your head around the tools, then start sourcing with Online Arbitrage. Take it step by step and do not try to learn everything at once.
How much does it cost to start Amazon FBA?
I always tell beginners to start with somewhere between £3,000 and £5,000 in capital. You can start with less, but to be fair it makes things a lot harder because you need stock to actually make money. On top of that you have got the Amazon Professional selling plan, which is £25 plus VAT, so about £30 a month.
Is Amazon FBA still worth it in the UK?
100%, but only if you treat it like a real business and not a get rich quick scheme. There is good money in it, and I am living proof of that, but it takes work and patience to build up. If you are expecting to be making serious money in your first few months, this is not for you, basically.
Do I need a limited company to sell on Amazon?
You do not strictly have to, you can sell as a sole trader, but this guide assumes you are going down the limited company route because that is what I would recommend for most people building a proper business. It keeps things cleaner and more professional. Speak to an accountant if you are unsure what is right for your situation.
Do I need to register for VAT?
You only need to register for VAT once your turnover hits £90,000 on a rolling 12 month basis. That is revenue, not profit, so keep an eye on it as you grow. When you are just starting out you are nowhere near it, so do not let it worry you on day one.
What is the best sourcing method for beginners?
Online Arbitrage, every single time. The big reason is if you make a mistake and buy stock that does not sell, you can usually return it, which you cannot do with wholesale or private label. Retail Arbitrage is also fine to dabble in, and Amazon to Amazon can work too, but I would steer well clear of wholesale and private label when you are brand new. You can read our full Mastering Online Arbitrage series for the deep dive.
How long does it take to make money on Amazon FBA?
Your first month or two can actually be a small loss while you are setting everything up and finding your feet, and that is completely normal. The saying I always come back to is “first year for learning, second year for earning”. The thing is, the sellers who push through that first year are the ones who go on to do really well.
How hard is it to get ungated on Amazon?
To be honest with you, ungating is the hardest hurdle most beginners hit early on. Some categories and brands are restricted, and you need to provide proper invoices to get approved to sell them. The key is persistence, you cannot take no for an answer, and our guide to getting ungated on Amazon UK walks you through exactly how to do it.
What is retail arbitrage?
Retail Arbitrage, or RA, is buying products in physical high street shops at a discount and reselling them on Amazon for a profit. It is basically the in person version of Online Arbitrage, walking round places like Tesco or Home Bargains with your scanning app. Have a look at our beginner’s guide to Retail Arbitrage if you fancy giving it a go.
The best UK shops for retail arbitrage
If you do fancy a bit of retail arbitrage, the question is always “which shops?” I have built store by store guides for the places actually worth your time, so here is where I would look:
- Supermarkets: Tesco, ASDA, Sainsbury’s, Aldi, Lidl, Farmfoods
- Discount and variety: Home Bargains, B&M, Savers, TK Maxx
- High street, health and home: Boots, Superdrug, WH Smith, Argos, Dunelm
- DIY, tools and electricals: B&Q, Screwfix, Toolstation, Halfords, Currys
- Toys, great for Q4: The Entertainer, Smyths, Costco
Two more worth a read before you head out: my retail arbitrage yearly planner for timing the seasonal sales, and my guide to the stores to avoid so you do not waste a trip.
Is Amazon FBA mentoring worth it?
It depends on you, to be fair. There is loads of free stuff out there, including this whole guide, and plenty of people build a great business without ever paying for mentoring. But if you learn faster with someone in your corner who has actually done it, then it can save you a lot of expensive mistakes. No hard sell from me, but if you want to know how I approach it you can read why I finally said yes to Amazon mentoring.
What is Amazon FBA, and how does it work in the UK?
Amazon FBA stands for Fulfilment by Amazon. You send your stock into Amazon’s UK warehouses, and Amazon handles the storage, packing, delivery and customer service whenever something sells. You find and buy the products, Amazon does the logistics. It is the same FBA system worldwide, you are just selling on the amazon.co.uk marketplace.
What are the Amazon FBA fees in the UK?
The main ones are the Professional selling plan at £25 plus VAT a month, a referral fee of roughly 8 to 15 percent of each sale depending on the category, and an FBA fulfilment fee per unit for the picking, packing and delivery. There are also storage fees, which go up in the run up to Christmas. Always work your fees out before you buy, and the FBA calculator does that for you.
How do I become an Amazon seller in the UK?
Set your business up first, then go to sellercentral.amazon.co.uk and sign up for a Professional seller account, verify your ID and your payment method, and you are in. The full step by step is in the guide above.
How do I send my products to Amazon FBA?
Once your stock arrives with you or your prep centre, you create a shipment in Seller Central, label the items, and send them in to an Amazon fulfilment centre. The “Getting your stock into Amazon” section above walks through the whole thing.
Where do I find wholesale suppliers for Amazon FBA in the UK?
As a beginner I would not chase traditional wholesale accounts straight away, and I explain why in the wholesale section above. The accessible route is an online wholesale platform like Qogita, where you can buy genuine branded stock in realistic quantities with proper invoices. Have a read of my Qogita review to see how it works.
Do I need an accountant for Amazon FBA?
Not on day one. Plenty of sellers, me included, start without one and bring an Amazon FBA accountant in as they get close to the VAT threshold. Just keep clean records and every invoice from the start and it makes that handover painless.
Can I start Amazon FBA alongside a full-time job?
Yes, and honestly it is the sensible way to do it. Loads of people, me included, started Amazon around a full-time job, sourcing of an evening and prepping at weekends. It keeps the pressure off while you learn, because you are not relying on it to pay the bills yet. I have written about doing exactly that in my Amazon alongside your 9 to 5 series.
What to do next
Look, that is pretty much everything I would tell a mate who was sat next to me asking how to get going on Amazon FBA in the UK. I have not held anything back. If you have read this far, you are already taking it more seriously than most people ever do, so fair play to you.
If you want to keep going, I have got loads of free stuff out there. Clue’s in the name. Here is where to find me:
- Join my free community. I run a free Discord with thousands of UK sellers in it, from complete beginners to people doing this full time. Come in, ask questions, lurk if you like, it is genuinely a good place to learn and there is room for everyone. Join the free community here.
- Watch the videos. I put out videos on my YouTube channel where I show my actual Seller Central, walk through real deals, and talk through the stuff that goes wrong as well as the stuff that goes right. If you learn better by watching someone do it, start there.
- Mentoring, if you want a hand directly. I held off on mentoring for ages, but I do it now for people who want me involved properly. No hard sell, you can book a call, ask me about your business, and we can have a chat about whether it is right for you. Here is why I finally said yes to mentoring.
Whatever you do, start somewhere. Keep your overheads sensible, protect your cash flow, remember the money is made in the buy not the sell, and just keep churning. It is going to take a bit of time, but if you put the work in, your profits are going to grow. Right, that is me. Go and get sourcing.
About the author
Simon Knight is a seven figure Amazon FBA seller based in the UK and the founder of FBA Mogul. He has spent years selling on Amazon UK through online arbitrage, and runs a YouTube channel and a community of over 2,300 sellers where he shares exactly how he does it, the good months and the bad. Everything in this Amazon FBA UK guide comes from real, hands on experience, not theory.