

In this article, I will cover how to add items to your Amazon inventory.
Before we add items to our inventory and create our shipment, we need to go over a few key points first.
Unfortunately, just because Amazon sells products like Apple iPhones, this does not mean you can sell them as well. Let’s go into what you should not sell (and cannot sell) on Amazon.
Hard Gated Products
Hard gated is a term we use for brands & products that are totally locked down, and no one can sell apart from Amazon and those sellers with direct permission from the brand. Some examples of these brands are Apple, Hugo Boss and Thierry Mugler.
You do not need to worry about these brands, as you are protected from making a mistake with them by the fact that you cannot sell them.
A good rule of thumb, by the way, is to ensure you can sell an item before you buy it; this saves you the hassle of returning the item.
Intellectual Property / Private Label Products
Some brands are dangerous to sell. You are allowed to add this product to your inventory and even send it to Amazon; however, the brand does not permit third-party sellers on their listings.
It is very important (especially as a new seller) to avoid brands that are IP.
An Intellectual Property (IP) claim is where a brand owner kicks you off the listing for using their brand/logo, etc, even though you’re selling their item.
You can often win these claims with an invoice; however, some brands are particularly protective of their listings and may claim that your items are inauthentic (even if they are not), and Amazon takes such claims very seriously.
It’s best to avoid these brands altogether, and we will cover how to spot them later on (it’s usually fairly straightforward, but does take some practice to identify them). However, I wanted to introduce the concept now.
New Seller Restrictions
Amazon treats new sellers with caution and often does not allow you to sell certain brands or categories within the first three months of account opening.
We have all been through this period where it kinda sucks, as you are a bit more restricted than a more experienced seller. It’s important to remember that as you prove yourself to Amazon by getting some sales under your belt and having sold for over 3 months, your account restrictions will eventually be lifted.
It’s not all bad; there are millions of brands and products on Amazon, and we just have to avoid some of them. However, there is still plenty left for us to sell. Let’s walk you through the process of adding a product to your inventory.
Adding An Item To Your Inventory
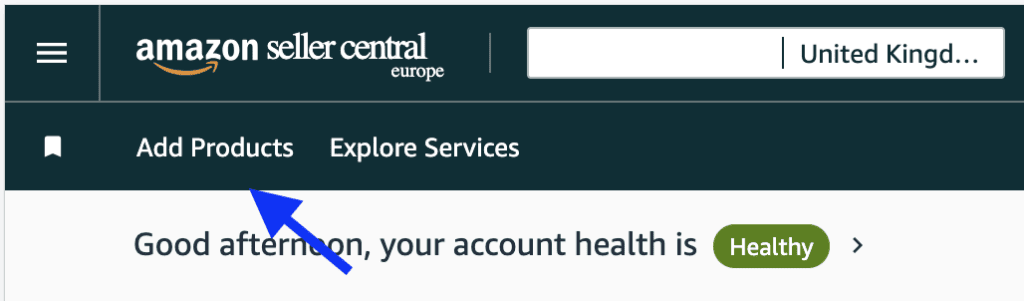
1. Log in to your Seller Central account dashboard and go to the “List your product” page, which is located on the top left-hand side. You can also click here to be taken to the list product page.
2. You are going to need to add in the ASIN or the GTIN/EAN/UP for your product. You should already have this as you will have an idea of what item you want to sell.
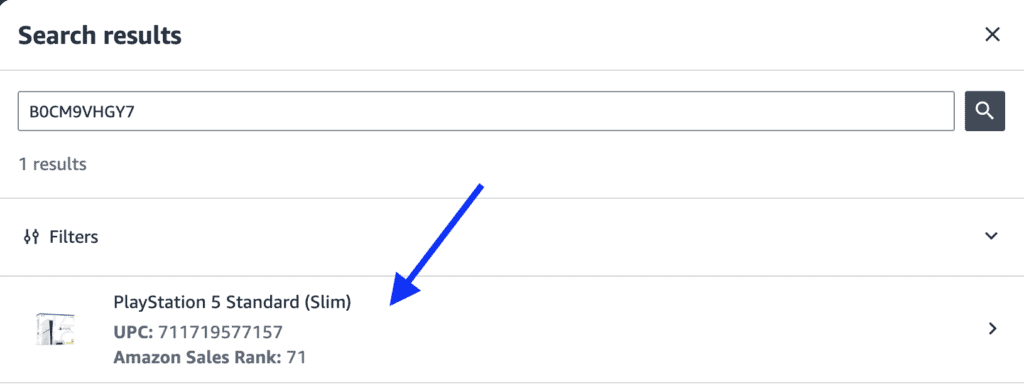
You can find the ASIN using tools like SellerAmp or even by looking in the URL of an Amazon product page and looking for the unique identifier that always starts with B0. In this case, we will use B0CM9VHGY7 as an example.
Go ahead and add your ASIN into the search bar and press “Search”

3. On the right-hand side, you will be given one or several options to select to sell; select the one with the ASIN that matches the one you searched.
4. Now we can select the condition of the item we are selling (in this case, choose “New”) and then click “Sell this product”.

5. You are now taken to the listing page. We need to fill in various bits of information -It varies depending on the product being listed, but generally, you are required to complete the following:
- SKU (You can leave this blank if you want for an auto-generated SKU)
- Price (Always set this 10-20% higher than the current price)
- Condition (New)
- Fulfilment Channel (Amazon will dispatch and provide customer service)
We will proceed with filling these in. You may see it’s asking for the quantity. This will go away once you click on the “Amazon will dispatch and provide customer service” option.
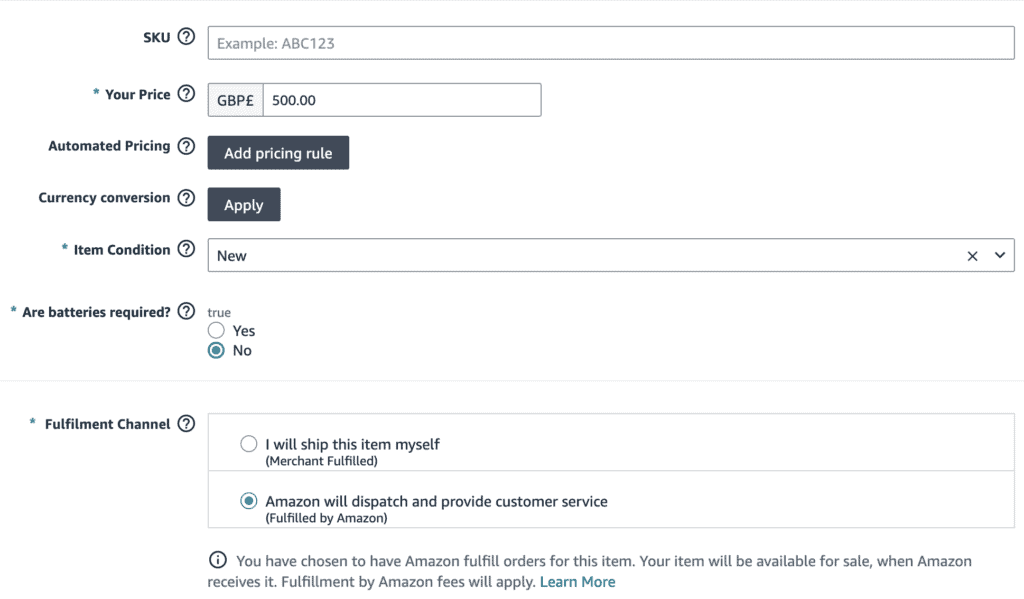
Finally, scroll down the page and click on “Save and finish”.
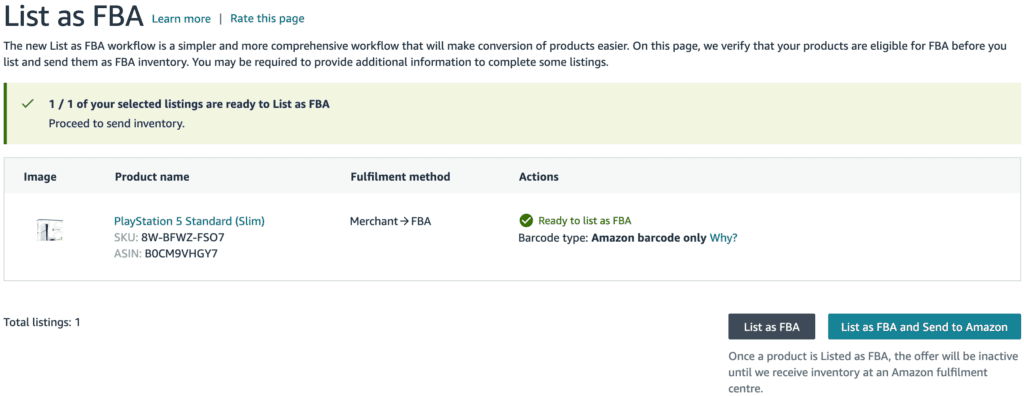
6. To complete the process, click on either the “List as FBA” button if you want to add the item to your inventory now but plan to send it in later. Alternatively, you can click the “List as FBA and Send to Amazon” button if you intend to send the item immediately and want to create a shipment.
Creating a shipment to Amazon
Now that we have added the items to our inventory, you will want to send these items to Amazon. See part 2 of this series on how to send your inventory to Amazon.
Amazon Basics – Part 2: Creating a shipment to Amazon
Common Inventory FAQ
Q. When adding an item to inventory, I am seeing a “Apply to sell” button instead of “Sell this product”?
A. This means you are “Gated” on this product and must go through the process of ungating this brand on Amazon in order to sell this brand.
Q. When adding an item to inventory, I am seeing a “Copy listing” button instead of “Sell this product”?
A. This means you are “Hard Gated” on this product and cannot sell this brand on Amazon. Do not attempt to copy the listing, as this cou