

In this article, I will cover how to send your items to Amazon’s fulfilment centre.
Creating A Shipment and Sending Your First Items To Amazon
Now that we have purchased our first items, we need to create a shipment and send them to Amazon.
Now I will be honest, Amazon’s platform for sending items is not the best; however, when you understand a few rules, you should not encounter any issues. Here are the rules to follow
- Do not mix standard-size items and oversized items in the same box
- Do not mix hazmat (perfumes, aftershaves, etc) with non-hazmat items in the same box
- Do not exceed 23kg for a box
- Do not exceed the box size of 63.5cm on any one side
If you follow those simple rules, then you should avoid any issues. There is nothing more annoying than packing a box together with lots of items, only to find that you cannot ship those items together in one box.
Creating a shipment in a nutshell
I will go into more detail on exactly how to create a shipment below (with detailed step-by-step instructions); however, I thought I would explain it from a high level.
- Add items to your Amazon inventory (sometimes requires ungating first).
- Prep and label your items with your own barcode
- Add them to the shipping plan on Amazon and put them in your cardboard box
- Finalise your shipment on Amazon and print off your UPS/DPD and FBA label.
- Arrange UPS/DPD to collect the parcel (or drop it off if you prefer)
Creating a shipment in detail
Before we begin, I would like to offer you some advice. I would focus on doing one box at a time to start with. Amazon do give you the ability to pack multiple boxes in one shipping plan; however, this can quickly become complicated, and you will make a mistake. So focus on one for now, and as you build up your experience, you can then begin doing multiple boxes at once if you wish.
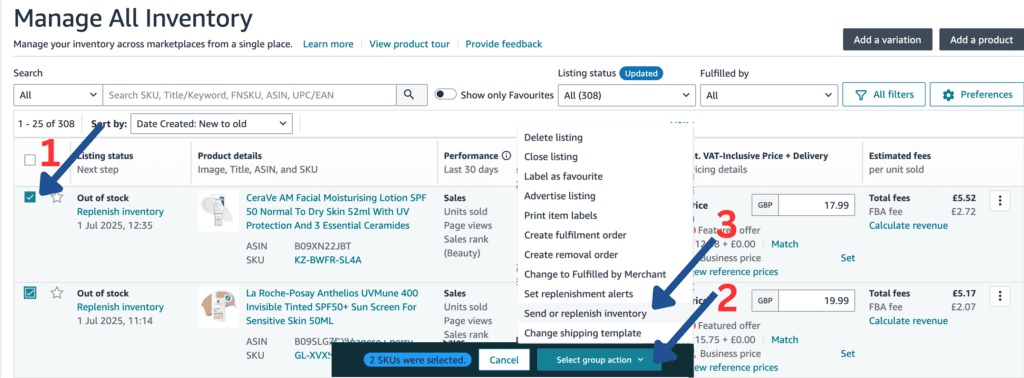
1. You should have already added your items to your inventory, and they should look something like this.

2. The next step is to select the items you want to send in (you can choose just one item for now and add more later). Once you have done this, you will see the “Select group action” drop-down.
Click that and then select “Send or replenish inventory”. This will take you to the shipment creation page, where the items you have chosen are pre-selected for this shipment.
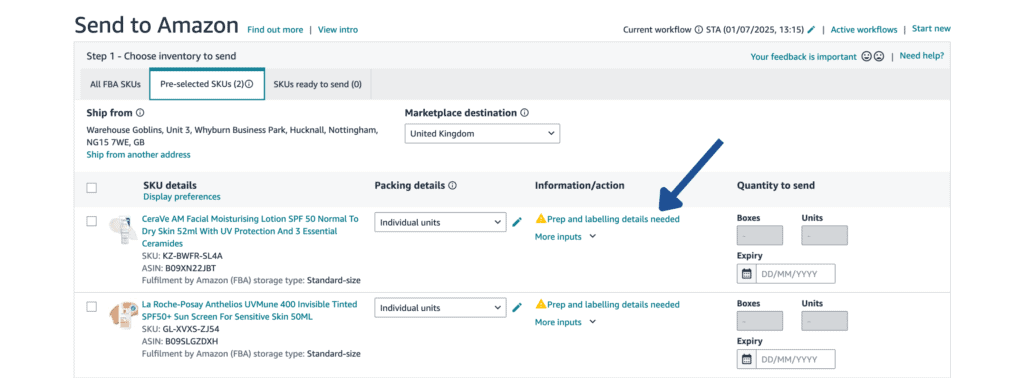
3. Now you should see your items listed inside the tab called “Pre-selected SKUs”. These are the items we selected earlier. You also have a tab to the right of that called “All FBA SKU’s” which is where you can select any other items to go into this shipment. On the right tab you have the tab “SKUs ready to send”, these are the items that are ready in the shipment.

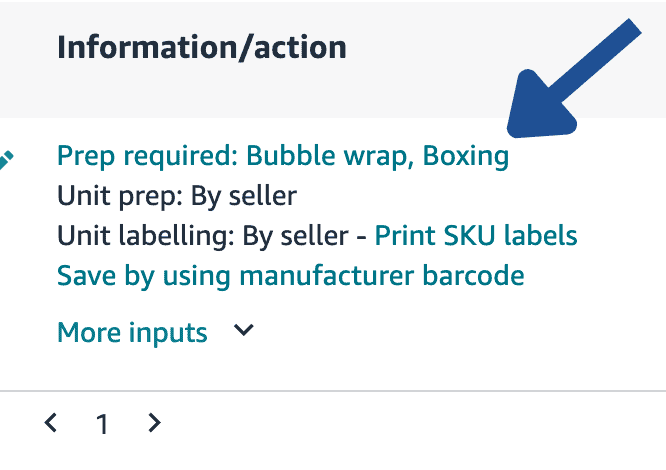
4. Now we need to give Amazon some basic information for each SKU. You will see next to each SKU that there is a “Prep and labelling details needed”. Click this, and a pop-up will show with the “Prep guidance” tab selected.
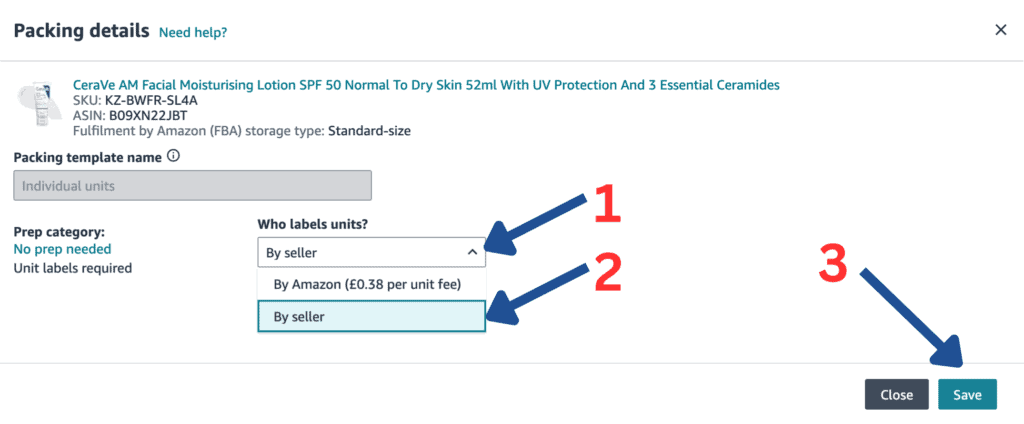
5. You need to select the kind of prep category required for this item. I would say 99% of products can be selected as “No prep needed” which is at the bottom of the list. Select this and then click “Save”.

6. You will then be asked, “Who labels units?”. Make sure you have “By seller” selected and click “Save”.
7. Repeat this action for all the SKUs (items) you have selected.
8. Now we need to ensure that we prepare our items and attach a label to each of them.
One thing you need to understand is that Amazon does not allow us to send items to them without some preparation (prep); however, the level of prep required depends on the type of item you are sending.
The most common types of prep required are as follows:
- A SKU label is attached only
- Polybagging and the SKU label attached
- Taping of the lid and the SKU label attached
- Bubble wrap and the SKU label attached
Most items do not require anything more than a label attached over the manufacturer’s barcode.

Liquids typically require two layers of protection to prevent any spillages from causing issues. Usually, this involves placing them in a poly bag if the item comes in just a bottle (such as shampoo); however, if they already come in a box (like perfume), then you do not need to bag these.

Items that are made of glass and other fragile items will typically need to be bubble wrapped.
Sometimes Amazon will give you specific guidance for the items’ preparation on the shipping plan (such as bubble wrap or boxing).
9. Now we need to tell Amazon how many items we are including in this shipment. We can do this on the right-hand side of the shipping plan where it says “Quantity to send”. You may also notice you might be required to enter an expiry date depending on the type of item you’re sending in.
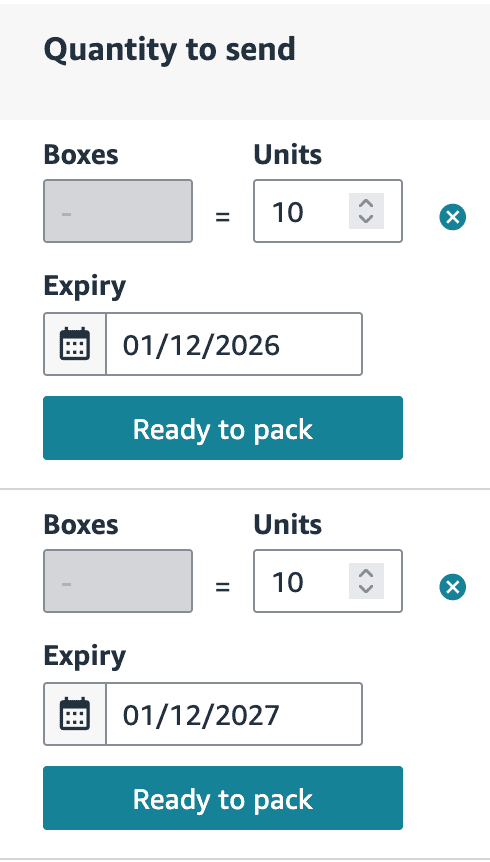
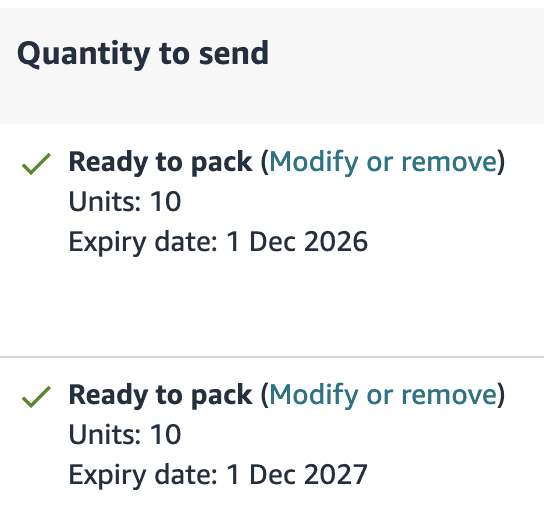
10. When we are happy with the quantity and the expiry date, we can click “Ready to pack”, and that will confirm that the item is now in shipment. We need to rinse and repeat this process until we have filled our box with items.
11. Once we have all our items added to the shipment plan, we can move on to the next step. Click the “Pack individual units” button, which will then take you to the “Pack individual units” step of the shipping plan. Here, you will specify the box in which you are adding your items. Since we are only packing one box at a time, this step should be simple.

12. Now we need to tell Amazon the size and weight of our box. Enter the actual size and weight of your box. Once you enter these click “Confirm packing information”. Once your box size and weight is confirmed, click “Confirm and continue”

If your box is above 15kg you will need to add a 4×6 label heavy warning label. You can download this label here.
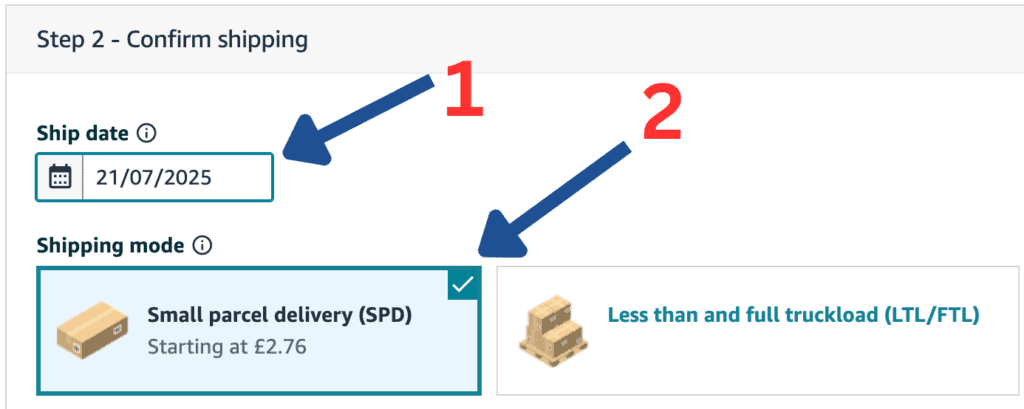
13. We are nearly there. The final step is to confirm shipping. Firstly, select the date you expect the shipment to be sent out. Next, we need to select “Small parcel delivery”.
15. Next, we select our shipping carrier. Sometimes you will have only one choice (UPS), other times you will be able to choose UPS or DPD. Pick the one that will suit you best, I normally choose UPS but DPD can often times be cheaper.

16. Now, we need to confirm that everything looks correct in the shipment. We can see the contents, size, and weight, as well as the address we are shipping from and the fulfilment centre the box is going to. Once we are happy, we can click the “I agree” checkbox, followed by “Accept charges and confirm shipping” button. You do not have to pay for the item now; it will come out of your account balance.

17. We are nearly there. Now we need to print our UPS and FBA labels to stick onto our box. In the “Print box and shipping labels” dropdown, select “Thermal Printing – 102 x 152mm (4×6 in) and click the “Print” button.

18. This will give you two 4×6 labels, which you can print on either a thermal printer (see equipment list) or on a standard sheet of A4 paper.
19. You are given two labels. One is the UPS shipping label, the other is a label produced by Amazon, which helps Amazon identify the box.

20. Congratulations. You have created your first shipment! You can now either drop the parcel off at a UPS collection point or arrange a free collection here.
If you think you have made a mistake, you have 24 hours to cancel the shipment and get a refund for the shipping label. You can cancel shipments by clicking the “Cancel shipments” button located at the bottom of the page.
You can also find links at the bottom to view all your shipments and the tracking details for the shipment you just created.

Common Shipping FAQ
Q. Can I not send my items from the retailer or wholesaler directly to Amazon?
A. No, you must prep your items correctly and build a shipping plan.
Q. I am being asked for an expiry date, but my product does not have one, or has a 6m/12m/24m label.
A. In this case, I usually select a few years into the future. If your product has a 12m/24m label, this means it will expire 12/24 months after opening. Again, I select several years into the future.
Q. Why do we use our own SKU labels instead of using the manufacturer’s barcode?
A. This allows Amazon to identify each item of stock as yours. If you use the manufacturer’s barcode, your items will be mixed with those of other sellers, which can lead to higher returns and poor customer experiences.
Q. What is a prep centre?
A. A prep centre is a service Amazon sellers use that does all of the above for you. You send them your items, and they do all the prep and shipping to Amazon for you.